
Knowledge Base
Search Tip: Fewer words will often return more results. Keep your search term short and concise.
| Creating A Stock Adjustment For A Solution Or Accessory This process is used to record stock movements for solutions or accessories e.g. adelivery from a supplier.
The stock module is accessed by clicking on the yellow arrow pointing to the right todisplay the 2nd set of icons and then by clicking on the stock module icon.
... Stock - i-Clarity |
||
| Creating A Stock Adjustment For A Frame Already On The System This process is used to record stock movements for a frame that is already on the system.
The stock module is accessed by clicking on the yellow arrow pointing to the right todisplay the 2nd set of icons and then by clicking on the stock module icon.
... Stock - i-Clarity |
||
| Adding A New Frame Model To The Stock System This process is to add a new frame model to the system.
The stock module is accessed by clicking on the yellow arrow pointing to the right todisplay the 2nd set of icons and then by clicking on the stock module icon.
... Stock - i-Clarity |
||
| Creating A Stock Transfer Stock transfers are used to create stock adjustments for multiple products in one go. Either because they are being sent back to the supplier or because they are being sent to another branch.
(To record stock movements into the practice for more than one product at a time the purchase order system should be used. See our other articles and training videos on this subject.)
The stock module is accessed by clicking on the yellow arrow pointing to the right todisplay the 2nd set of icons and then by clicking on the stock module icon.
... Stock - i-Clarity |
||
| Modifying A Stock Transfer Stock transfers are used to create stock adjustments for multiple products in one go. Either because they are being sent back to the supplier or because they are being sent to another branch.
(To record stock movements into the practice for more than one product at a time the purchase order system should be used. See our other articles and training videos on this subject.)
The stock module is accessed by clicking on the yellow arrow pointing to the right todisplay the 2nd set of icons and then by clicking on the stock module icon.
... Stock - i-Clarity |
||
| Receiving A Stock Transfer Stock transfers are used to create stock adjustments for multiple products in one go. Either because they are being sent back to the supplier or because they are being sent to another branch.
(To record stock movements into the practice for more than one product at a time the purchase order system should be used. See our other articles and training videos on this subject.)
The stock module is accessed by clicking on the yellow arrow pointing to the right todisplay the 2nd set of icons and then by clicking on the stock module icon.
... Stock - i-Clarity |
||
| Stock Take (Reconcile Stock) Reconciling stock in i-Clarity will require you to list all the products in your practice (you can do this in different product groups to make this process more manageable). When complete, i-Clarity will compare this list you have created with the current stock values on i-Clarity and make any adjustments as necessary.
The stock module is accessed by clicking on the yellow arrow pointing to the right to display the 2nd set of icons and then by clicking on the stock module icon.
... Stock - i-Clarity |
||
| Understanding Purchase Order References All Purchase Orders are identified by a unique Purchase Order number which has the following format:
BB/TXXX
BB is the branch code, T is the Type and XXX is a sequential number.
The types are as follows:
S: Spectacles, i.e. glazing orders
L: Lenses ordered separately from the glazing order, e.g. uncuts or remote edged
F: Frame ordered for a glazing order but from a separate supplier to the workshop
ST: Stock, i.e. products NOT ordered for a specific patient
C: Contact lenses
So, a typical order reference might look like this:
CE/C701 – Clarity Eyecare Contact Lens Order #701... Stock - i-Clarity |
||
| Creating Purchase Orders Through The Dispense Module i-Clarity Purchase Order Processing consists of 5 stages:
Creating an initial purchase order
Sending it to the supplier
Recording the goods and services that have been received
Reconciling the goods received with the supplier invoice
Exporting the confirmed invoice to an accounts package, e.g. Xero, for analysis and payment.
Purchase Orders are created in 5 different ways:
When you create a spectacle order by confirming a dispense
When you create an order from the CL Management form
From the Stock Form – e.g. for frame stock
From the Stock Form – automated ‘Impress’ ordering
From the Stock form – using automated reorder quantities
This article looks at method 1, creating a purchase order through the dispensing module by confirming a dispense.
Creating a Spe... Stock - i-Clarity |
||
| Creating purchase orders through the contact lens management module i-Clarity Purchase Order Processing consists of 5 stages:
Creating an initial purchase order
Sending it to the supplier
Recording the goods and services that have been received
Reconciling the goods received with the supplier invoice
Exporting the confirmed invoice to an accounts package, e.g. Xero, for analysis and payment.
Purchase Orders are created in 5 different ways:
When you create a spectacle order by confirming a dispense
When you create an order from the CL Management form
From the Stock Form – e.g. for frame stock
From the Stock Form – automated ‘Impress’ ordering
From the Stock form – using automated reorder quantities
This article looks at method 2, creating a purchase order through the contact lens management module.
Creating a CL Order... Stock - i-Clarity |
||
| Creating a purchase order for a stock order i-Clarity Purchase Order Processing consists of 5 stages:
Creating an initial purchase order
Sending it to the supplier
Recording the goods and services that have been received
Reconciling the goods received with the supplier invoice
Exporting the confirmed invoice to an accounts package, e.g. Xero, for analysis and payment.
Purchase Orders are created in 5 different ways:
When you create a spectacle order by confirming a dispense
When you create an order from the CL Management form
From the Stock Form – e.g. for frame stock
From the Stock Form – automated ‘Impress’ ordering
From the Stock form – using automated reorder quantities
This article looks at method 3, creating a purchase order for stock items such as stock frames or solutions
Creating a Stock Ord... Stock - i-Clarity |
||
| Creating purchase orders automatically whenever you send a frame, from a particular supplier, away to be glazed i-Clarity Purchase Order Processing consists of 5 stages:
Creating an initial purchase order
Sending it to the supplier
Recording the goods and services that have been received
Reconciling the goods received with the supplier invoice
Exporting the confirmed invoice to an accounts package, e.g. Xero, for analysis and payment.
Purchase Orders are created in 5 different ways:
When you create a spectacle order by confirming a dispense
When you create an order from the CL Management form
From the Stock Form – e.g. for frame stock
From the Stock Form – automated ‘Impress’ ordering
From the Stock form – using automated reorder quantities
This article looks at method 4, creating a purchase order automatically whenever you send a frame, from a particular supplier, away to be glazed
... Stock - i-Clarity |
||
| Creating a purchase order when stock levels fall below a defined level i-Clarity Purchase Order Processing consists of 5 stages:
Creating an initial purchase order
Sending it to the supplier
Recording the goods and services that have been received
Reconciling the goods received with the supplier invoice
Exporting the confirmed invoice to an accounts package, e.g. Xero, for analysis and payment.
Purchase Orders are created in 5 different ways:
When you create a spectacle order by confirming a dispense
When you create an order from the CL Management form
From the Stock Form – e.g. for frame stock
From the Stock Form – automated ‘Impress’ ordering
From the Stock form – using automated reorder quantities
This article looks at method 5, creating a purchase order when stock quantities fall below a defined level
Automated Stock Re-Or... Stock - i-Clarity |
||
| Receiving a purchase order i-Clarity Purchase Order Processing consists of 5 stages:
Creating an initial purchase order
Sending it to the supplier
Recording the goods and services that have been received
Reconciling the goods received with the supplier invoice
Exporting the confirmed invoice to an accounts package, e.g. Xero, for analysis and payment.
This article looks at section 3, recording the goods and services that have been received
When you receive stock, you should always record the fact that it has been received against the relevant purchase order. This will achieve several objectives depending on the type of order that you are dealing with. In all cases, recording the fact that a purchase order has been received will make it possible to reconcile those purchase orders with the relevant invoices – see the section on Invoicing for further details about this.
Spectacle orders
These are... Stock - i-Clarity |
||
| Reconciling purchase orders i-Clarity Purchase Order Processing consists of 5 stages:
Creating an initial purchase order
Sending it to the supplier
Recording the goods and services that have been received
Reconciling the goods received with the supplier invoice
Exporting the confirmed invoice to an accounts package, e.g. Xero, for analysis and payment.
This article looks at section 4, reconciling the goods received with the supplier invoice
Once you have created purchase orders and recorded the fact that the goods you ordered have been received (or not, as the case may be) then you can use i-Clarity to reconcile your purchase orders and delivery notes with the supplier invoices. This complete purchase order processing (‘POP’) cycle has several benefits:
When you record goods received you are checking that you have received the goods that you have ordered – and only those goods that you have ordered.... Stock - i-Clarity |
||
| Exporting purchase orders for analysis and payment i-Clarity Purchase Order Processing consists of 5 stages:
Creating an initial purchase order
Sending it to the supplier
Recording the goods and services that have been received
Reconciling the goods received with the supplier invoice
Exporting the confirmed invoice to an accounts package, e.g. Xero, for analysis and payment.
This article looks at section 5, exporting the confirmed invoice to an accounts package, e.g. Xero, for analysis and payment.
Once an invoice has been confirmed you can print it and export to a text file or spreadsheet that can be imported directly into some account’s packages e.g. Sage or Xero.
Alternatively, you can ‘batch’ together a batch of invoices, which will give a reference for that batch, as shown here:
... Stock - i-Clarity |
||
| Creating Staff Types Staff types are used to allocate appointments to staff groups. When you add a user, you allocate them to a staff group from this list you are creating now, they will then be bookable for the appointments in that group. (The appointments are added in the “Appointment Types” tab). For example, contact lens opticians will be assigned contact lens aftercare appointments and contact lens trial appointments but not eye exam appointments.
In the Staff Types tab in the maintenance module, fill in the boxes at the bottom of the page from left to right.
... Maintenance - i-Clarity |
||
| Creating or editing form permissions This is your security section. You can create a group of permissions allowing anyone assigned to that group access to certain sections and functions of the system. For example, only a manager would be able to carry out a write off or refund.
Navigate to the Form Permissions tab in the maintenance module.
The top section of the screen would need to be filled out first. This is where you name your permission group E.g. Manager
Fill in the boxes from left to right.
... Maintenance - i-Clarity |
||
| Add A New User Please note: We recommend that you complete the “Staff Type” and “Form Permissions” tabs before completing the users tab. If you have not already done so, please go back to “creating staff types” and “creating or editing form permissions” in the knowledgebase.
Navigate to the Users tab in the maintenance module.
Fill in the user details in the lower half of the screen as shown below.
... Maintenance - i-Clarity |
||
| Custom Appointment Durations You may have a user who needs a different amount of time to carry out an appointment to the one that the appointment is set to. E.g. You may set an eye exam to be 30 minutes, but your pre-reg optometrist may need 45 minutes. In order that the correct amount of time is blocked out for the pre-reg, without users having to manually alter appointment times, you can create custom appointment lengths:
In the users tab in the maintenance module.
Click custom appointment durations button.
... Maintenance - i-Clarity |
||
| Choose KPI Recipients If you would like KPI’s to be sent to users, you can set that in the 'Misc. 2' tab of maintenance.
Select the user from the dropdown list.
Select the branch of the KPI’s you want the user to receive.
... Maintenance - i-Clarity |
||
| Adding Appointment Types
In the maintenance module, navigate to the Appointment Types tab.
Start on the top half of the page by adding the appointment types you need:
... Maintenance - i-Clarity |
||
| Assigning appointment types to users Once the appointment type has been added it needs to be assigned to a staff type. This allows you to control which appointments appear in which Clinicians appointment clinics. (If you have not already added your staff types, please see the “Creating staff types” article.)
Navigate to the Appointment Types tab in the maintenance module.
Assigning appointments to staff types is done on the bottom left hand section of the screen.
... Maintenance - i-Clarity |
||
| Assigning appointment types to recall schemes Scheme types link appointments to recalls, forms and record printing. An appointment type assigned to the scheme type Eye Exam, will mean during clinic preparation if the patient is entitled to an NHS exam a GOS1 form will be printed. It also means that an eye exam paper record will be printer (rather than a contact lens paper record)
The scheme type to appointment type link is also important if you have the feature ‘arrival resets recall turned on (branches tab). If this feature is turned on when a patient attends an appointment the system checks the scheme type linked to the appointment, if the patient has a recall communication in the pending communications section of their record of the same scheme type it will automatically update their communication send date. This is a failsafe so that if the patients recall does not get updated the patient does not receive a recall reminder shortly after attending an appointment.
In the maintenance module navigate to th... Maintenance - i-Clarity |
||
| Replace appointment types You can replace old appointment types using the “Delete old appointment types” button in the appointment types tab.
Please note: The old appointment will be renamed everywhere in the system. In patient’s appointment tabs any appointment previously booked will now appear to have been the new appointment type. Any appointments booked in the system will be renamed to the new appointment type. If you want historical appointment information to remain the same, but the appointment to no longer be available please see the “Remove appointment types” section below.
In the maintenance module, go to the Appointment Types tab.
The “Delete Old Appointment Types” button is at the bottom right hand corner:
... Maintenance - i-Clarity |
||
| Remove appointment types You can stop the appointment from being booked in the future without altering any previous information. Any previous appointments of this type will still show in the patient’s appointment tab. Any appointments booked but not yet completed will still show as this appointment type on the report, but if you open the appointment to edit it you will have to change to a new appointment type.
To remove an appointment type, go to the Appointment Type tab in the maintenance module.
We will be working on the bottom left hand side of the screen:
... Maintenance - i-Clarity |
||
| Default appointment diary view options There are three layouts of the appointment’s module; configuration mode, standard mode, and maximise clinics. You can switch between these modes from within the appointment’s module, but you can set a default mode for each practice, so when the appointments module is opened you get the layout you prefer.
In maintenance, go to the Branches tab select your default mode from the Appt Detail dropdown list:
... Appointment Diary - i-Clarity |
||
| Set minimum appointment length You can set a minimum appointment length in the Misc. tab.
This then does not allow a user to book an appointment in a slot less than the inputted amount of time.
... Appointment Diary - i-Clarity |
||
| Automatically adjust appointment length There may be times when you have an appointment type that is longer or shorter than time intervals available on the system e.g. Your clinic may be laid out in 30-minute intervals, but you may have a 20-minute or 40-minute appointment. You can choose how the system handles this situation with the “automatically adjust appointment length” check box.
Navigate to the Misc. tab in the Maintenance module.
If the checkbox is ticked:When you book an appointment that is different in length to the slot you are booking it into, you will get a warning that the appointment isn’t of optimal length, then the system will take some time from the following appointment slot in order to block the correct amount of time out of the clinic, or if the appointment is shorter it will leave a smaller slot of time available to be booked.... Appointment Diary - i-Clarity |
||
| Using large appointment slots based on appointment duration In Maintenance > Misc. 3 there is a “use large appointment slots” check box.
... Appointment Diary - i-Clarity |
||
| Show clinics one day at a time In the Branches tab of Maintenance you will find a checkbox called “show clinics one day at a time” on the right-hand side:
... Appointment Diary - i-Clarity |
||
| Refresh Interval For Individual Clinic Window In the appointments module you can open the days clinic in a separate window so that it is available to look at without going in and out of the appointment’s module. It is particularly useful for the clinician. You can set how often this window refreshes with up to date information in the Clinic Refresh Interval box in the branches tab. Put your desired refresh interval in in seconds:
... Appointment Diary - i-Clarity |
||
| Appointment Diary Refresh Interval The appointment screen will refresh each time you open the appointments module. If the appointments module is left open, it can automatically refresh at a given interval. So, if you leave your appointment module open on one computer and someone else books an appointment, that appointment will become visible on your open appointments page when the screen refreshes. You can set how often that happens in the branches tab.
... Appointment Diary - i-Clarity |
||
| Manage And Assign Practice Resources If you have resources in your practice that are limited, you can add them to i-Clarity so that they can be assigned to an appointment. The colour of the appointment will change to reflect that the resource will be in use, so others are aware not to book another appointment at the same time with the same resource. Examples of could be if you only have one coloured overlay set, or one disabled parking space:
In the resources tab in the maintenance module, fill in the boxes at the bottom from left to right.
... Maintenance - i-Clarity |
||
| Adding A New Analysis Code Analysis codes are common headline information that you want to add to the front page of the patient’s record. E.g. if a patient is on a direct debit, or is diabetic, or part of a loyalty scheme.
You can also filter patients by analysis codes in the marketing module. By default, any code assigned to a patient will be displayed on the front page of their record.
... Main Form - i-Clarity |
||
| Amending An Analysis Code Analysis codes are common headline information that you want to add to the front page of the patient’s record. E.g. if a patient is on a direct debit, or is diabetic, or part of a loyalty scheme.
You can also filter patients by analysis codes in the marketing module. By default, any code assigned to a patient will be displayed on the front page of their record.
... Main Form - i-Clarity |
||
| Deleting An Analysis Code Analysis codes are common headline information that you want to add to the front page of the patient’s record. E.g. if a patient is on a direct debit, or is diabetic, or part of a loyalty scheme.
You can also filter patients by analysis codes in the marketing module. By default, any code assigned to a patient will be displayed on the front page of their record.
... Main Form - i-Clarity |
||
| Cancellation Reasons This is where you can populate reasons a patient record may be cancelled. A cancelled patient’s record will not allow any appointments to be booked, no transactions to go through, and no communications to be sent.
Go to the cancellation reasons tab in the maintenance module and fill in the boxes at the bottom of the page from left to right.
... Maintenance - i-Clarity |
||
| Add a new GP In the maintenance module, go to the GP tab.
This is where you can populate the Genreral Practitioner’s in your area that can then be added to a patient’s file, i-Clarity will then use this to fill in NHS forms etc.
Fill in the GP’s detail in the boxes at the bottom of the page.
... Maintenance - i-Clarity |
||
| Allow users to edit GPs without maintenance access You can allow users to modify GP records even if they do not have maintenance access. To enable this, navigate to the 'Misc.' tab in maintenance and locate the checkbox “Allow users to modify GP records”.
If this is checked then users will be able to modify the details of a GP for all patients assigned to that GP from a patient’s record.... Maintenance - i-Clarity |
||
| Replacing GPs when a GP retires or leaves a practice In order to keep your GP list tidy, when a GP retired or leaves a practice, we suggest that you use the spreadsheet function in the GP tab in maintenance to replace the GP with another GP at the practice.
Navigate to the 'GP' tab in the maintenance module.
Click on the Create GP spreadsheet button. This will open a new window... Maintenance - i-Clarity |
||
| Add college or school details In the maintenance module, go to the Colleges tab. This is where you can add the colleges that are local to your practice to add to patients files. i-Clarity will use this to fill in NHS form etc.
Fill in the college information into the boxes at the bottom of the page.
... Maintenance - i-Clarity |
||
| Allow users to edit colleges or schools without maintenance access You can allow users to modify college records even if they do not have maintenance access. To enable this, navigate to the 'Misc.' tab in Maintenance and tick the “Allow users to modify college records” checkbox.
If this is checked then users will be able to modify the details of a college for all patients assigned to that college from a patient’s record.... Maintenance - i-Clarity |
||
| Adding Corporate Company Details When someone else is paying for services or products on behalf of the patient, the balance is cleared off the patient’s record as they do not owe any money. The balance to be paid goes into the deferred payments module, so that you can track what is owed.
Payments due for GOS forms on the NHS are already set up to go to deferred payments, but you may have other third party payers such as eden red, or a local company that uses your services for their employees.
You can add the details of any corporate clients that you use for their eye care, and third party national corporate schemes. This can then be added to a patient’s record and when a corporate fee goes through the till the fee will go into the correct corporate file in deferred payments. You can also use a corporate to automatically pay a product off into the correct deferred payment folder. E.g. you can have an Eden Red eye exam fee and when this is selected it will not go through to the till page, ... Maintenance - i-Clarity |
||
| Adding Patient Sources This is where you can add options of how your patients may have heard of you and add it to their record. This list is also used in the attendance reason drop down list when you are booking appointments. This is useful for recording how successful marketing campaigns are or how many patients have been recommended to your practice using the reports in i-Clarity.
Go to the 'Patient Sources' tab in the maintenance module.
Fill in the boxes at the bottom of the page, from left to right, with the name of the source, any notes, and the branch from the dropdown list.... Maintenance - i-Clarity |
||
| Setting Up Occupations You can create a list of occupations to record in a patient’s record. There will be a list of common occupations already in i-Clarity, but you can add more in the 'Occupations' tab in the maintenance module.
Add the occupation and any notes in the boxes at the bottom of the page.... Maintenance - i-Clarity |
||
| Enable a prompt to display when patient details are missing You can select certain fields in patient records as prompted fields. This means that if this field is not filled in, when the user leaves the patient record a warning message will show up. To set these fields go to 'Misc. 2' tab in the maintenance module.
Tick the box(es) of the field(s) you would like to recieve prompts for.
... Maintenance - i-Clarity |
||
| Set default communication preferences In patient records, there are dropdown lists for email and SMS communication options to help with GDPR rules. The customer can choose to accept or decline receiving email updates, and, if they are happy to receive SMS messages, recall only, or phone only on their mobile. You can set the default for the lists in the branches tab in the maintenance module
... Maintenance - i-Clarity |
||
| Create Custom Patient Folders You can add documents to patients records such as hospital letters, field results, previous records etc. You can separate the documents out into different folders to make it easier to find what you are looking for when you retrieve them. If you wish to add any extra patient folders, such as PEARS/MECS paperwork in their own folder, you can do so in the 'Misc. 4' tab of maintenance:
... Maintenance - i-Clarity |
||
| Change Patient Notes Display Period i-Clarity creates a number of system notes in patient activity for when appointments are booked, changes are made to the patient front page, communications are sent etc. You can choose how long these notes stay in the system for to keep the patient activity tab tidy.
Enter the number of days you would like to keep the notes for in the box:
... Maintenance - i-Clarity |
||
| Find The Location Of Recall Or Adhoc Docs Folders You can find the folder location in the “Branches” tab of Maintenance:
If the word document you are saving is a recall letter the file location where you need to save the document is the Recall Communications Path.
If it is any other communication, such as a marketing letter, the file location where you need to save the document is the Adhoc Communications Path.
... Maintenance - i-Clarity |
||
| Adding mail-merge fields to a communication Mail-merge “placeholders” will enable patient’s details to be mail merged into your document. To begin this process, you need to export a sample mail merge file from i-Clarity to use in your document.
Log in to i-Clarity and go to the “further details” tab in patient records.... Maintenance - i-Clarity |
||
| Creating recall schemes and stages i-Clarity recalls can be separated into three sections: schemes, stages, and communications. The function of the recall schemes is to manage the expiry date of the patient’s prescription and when the patient is due for another appointment. Stages manage the time intervals of the patient’s reminders. Communications allow you to individualise your reminders to different groups of patients and manage the order of your communication type preferences.
This article looks at the first 2 steps, setting up recall schemes and stages.
Recall Schemes
Navigate to the Recall Scheme tab in the maintenance module.
Working in the top half of the screen, you need to add each of the schemes that you want available for use, filling in the boxes just below the grid from left to right.
... Maintenance - i-Clarity |
||
| Setup recall communications i-Clarity recalls can be separated into three sections: schemes, stages, and communications. The function of the recall schemes is to manage the expiry date of the patient’s prescription and when the patient is due for another appointment. Stages manage the time intervals of the patient’s reminders. Communications allow you to individualise your reminders to different groups of patients and manage the order of your communication type preferences.
This article looks at Recall Communications.
The communication defines the content of the recall the patient receives and how they receive the recall. It also allows you to breakdown each communication stage into age groups so that you can send different content to each group in different ways.In the maintenance module, go to the Recall Communications tab.
Select the recall scheme you want to add communications to, from the dropdown list.... Maintenance - i-Clarity |
||
| Create ad-hoc communications This is where you can set up any kind of communication other than a recall. You will need to create a sample merge file to set up your documents with the correct merge fields.
Mail-merge “placeholders” will enable patient’s details to be mail merged into your document. To begin this process, you need to export a sample mail merge file from i-Clarity to use in your document.
Log in to i-Clarity and go to the “further details” tab in patient records.... Maintenance - i-Clarity |
||
| Automated appointment confirmations (general) You can set the system to automatically send appointment confirmations and reminders.
In the Branches tab of Maintenance, click on the 'Appointment Confirmations' button. This will open a new window. (Please note: There is also an appointment confirmations button in the “Appointment Types” tab. This will update the appointment confirmation communication for the branch you are logged in to only.)... Maintenance - i-Clarity |
||
| Automated appointment confirmations (specific) You can set the system to automatically send appointment confirmations and reminders. You can create different messages for different appointment types, E.g. you may want to include a reminder to wear contact lens’ for an aftercare appointment.
In the Branches tab of Maintenance, click on the 'Appointment Confirmations' button. This will open a new window. (Please note: There is also an appointment confirmations button in the “Appointment Types” tab. This will update the appointment confirmation communication for the branch you are logged in to only.)... Maintenance - i-Clarity |
||
| Automated appointment reminders You can set appointment reminders in the maintenance module in the Misc. 2 tab.
... Maintenance - i-Clarity |
||
| Set SMS From Name In the Branch tab of Maintenance there is a text box for you to type in what name you would like to appear as the sender on your SMS messages.
... Maintenance - i-Clarity |
||
| Create Email Footer You can add an email footer in each branch tab that will be added to the bottom of all emails sent through i-Clarity:
Double click on the text box. This will open a new window... Maintenance - i-Clarity |
||
| Automatically delay multiple recalls In Misc. tab of Maintenance there is a check box that will stop patients receiving multiple recalls.
... Maintenance - i-Clarity |
||
| Send Long SMS Without Prompting There is a character limit of 160 per SMS message. If you go over this character count, there will be additional charges.
In the Misc. 5 tab of Maintenance there is a “send long SMS without prompting” checkbox.
If this checkbox is not checked, when sending mass communications such as recalls or marketing, the communications will fail to send if the SMS messages are over 160 characters.
If the box is checked, then the communications will send, even if the character limit has been exceeded, but you will be charged for additional messages.
... Maintenance - i-Clarity |
||
| SMS path for external software If you are using an external SMS messaging service, not provided by i-Clarity, you can put your SMS Exe Path in the Misc 6. Tab of Maintenance.
... Maintenance - i-Clarity |
||
| Adding a computer to i-Clarity Before i-Clarity can be used on a computer it needs to be added to the i-Clarity system. To do this you will need to add the computer in maintenance on an existing computer.
In the Computers tab, fill in the first column of information.
... Maintenance - i-Clarity |
||
| eGOS security certificate If you need to submit GOS forms to the PCSE website from this computer, you need to install the security certificate.
Create a folder called ‘programs’ in the c: drive of your computer.... EGOS - i-Clarity |
||
| Enable Password Protection Throughout i-Clarity i-Clarity allows you to password protect individual areas and functions of the system.
Navigate to the Password Protection tab in the maintenance module. This tab allows you to add the requirement to enter your password when accessing certain areas of the system. This is done per computer because you may want to have a increased level of module password protection on front of house computers where staff move between computers compared to a consulting room where there is no or little change of computer user.
Each column, when ticked, requires a password to open the corresponding module button in i-Clarity. We recommend as a minimum the financial modules of the system have password protection active.
... Maintenance - i-Clarity |
||
| Connecting POS/receipt printers, printers, barcode printers and scanners Please note: Any devices supplied by i-Clarity can be added with the support of the i-Clarity team.You should add the device from the computer that the device is physically connected to.
Go to the Devices tab in the maintenance module.
Fill in the empty boxes in the first column.
... Maintenance - i-Clarity |
||
| Adding clinical equipment Please note: Any devices supplied by i-Clarity can be added with the support of the i-Clarity team.You should add the device from the computer that the device is physically connected to.
You can create a list of tonometers used in the Misc 5 tab of Maintenance
... Maintenance - i-Clarity |
||
| Set NHS voucher limits This function allows you to set a maximum lens price covered by an NHS voucher. E.g. If you usually dispense patients with an NHS voucher A with a lens that is on the system at £50, you can set the system to discount the £50 to the voucher value when you click the “Adjust Lens Prices” button in the dispense module.
In the maintenance module, go to the Misc. 3 tab.
Fill the boxes in from left to right as shown below.
... Maintenance - i-Clarity |
||
| Assign default order types for a branch In the dispensing module there is an order type drop down list where you can select from options such as prepare and advise, remote edging, uncut ect. You can set a default for this list so that your most common order type is already selected so that you do not have to change it each time.
Navigate to the correct branch using the arrow buttons in the top left-hand corner.... Maintenance - i-Clarity |
||
| Set default blank sizes In the Misc. 3 tab in the maintenance module, you can set default blank sizes.
... Maintenance - i-Clarity |
||
| Set default workshop for dispensing When dispensing, you select the workshop that your order is going to. If you generally use one workshop more than the others you can set a default workshop in the branches tab. When you go into the dispensing module, your default workshop will already be selected. This can be changed manually at the time of dispense if needed.
In the branches tab select your default workshop from the dropdown list. This list is populated from the suppliers tab.
... Maintenance - i-Clarity |
||
| Set 'order lenses' to default In the misc 3 tab of Maintenance you can tick the “Order Lenses by Default” check box. This will then automatically check the “order lenses” checkbox in the dispensing module.... Maintenance - i-Clarity |
||
| Create a promotion You can create promotions packages in the promotions tab in maintenance. This allows the user to select frames and lenses at reduced prices when they select the promotion in the dispense module. You can add either frames or lenses or a combination of both. If you add both frames and lenses to a promotion you will only be able to select a combination of the promotion frames and lenses for the promotion to work.
Creating a promotion
In the maintenance module go to the promotions tab.
Fill in the boxes from the top half of the screen from left to right.
In the first box, type in the name of the promotion. This is what will show up in your promotions list in the dispensing module.
In the next box, choose from the dropdown list which branch this promotion is available in.
If you have a start date for the promotion you can select this from the date box, or check the box for “remove date” if you don&... Maintenance - i-Clarity |
||
| Editing and deleting promotion products Promotions allow the user to select frames and lenses at reduced prices when they select the promotion in the dispense module. You can add either frames or lenses or a combination of both. If you add both frames and lenses to a promotion you will only be able to select a combination of the promotion frames and lenses for the promotion to work.
In the promotions tab in the maintenance module, highlight the promotion you wish to edit by clicking on it in the top half of the screen. The arrow shows which promotion you are editing.... Maintenance - i-Clarity |
||
| Deleting dispensing estimates When you load the dispensing module, if there are lots of dispense estimates in the patient’s record it can take longer to open the module. To help with this you can set i-Clarity to delete dispense estimates after a given number of days.
Navigate to the Misc tab in the maintenance module
Tick the checkbox 'Delete Dispense Estimates after'.
Type in the number of days you want the dispenses to stay in the system before being deleted
... Maintenance - i-Clarity |
||
| Set default deposit prompt and percentage You can set the system to prompt for a deposit at a chosen percentage in the Misc. tab of Maintenance.
... Maintenance - i-Clarity |
||
| Require registered optician sign-off for u16 Due to regulations regarding dispensing spectacles to under 16’s, you can stop anyone who isn’t a registered professional from collecting spectacles off the system.
If this box is checked, when a user tries to collect spectacles off the system it will require the password of a registered professional.
If the checkbox is unticked, any user will be able to collect spectacles on the system.
This box is checked by default and is recommended.... Maintenance - i-Clarity |
||
| Setup Banks to be used for patients direct debit payments When you are setting up a direct debit for a patient and you enter their bank details, i-Clarity can pull through the bank’s address based on the sort code entered. You can populate a list of banks and addresses in the Banks tab in the maintenance module.Fill in the boxes at the bottom of the page from left to right.
... Maintenance - i-Clarity |
||
| Collection methods You can set different ways for direct debit / standing order money to be collected. You may offer a third party eyecare plan as well as allowing patients to set up standing orders or collect your own direct debits. You can set a list of different collection types in the collection method tab in the maintenance module. When you set up a mandate for a patient, these options will be available to select in the mandate.
Fill in the information at the bottom of the page.
... Maintenance - i-Clarity |
||
| Direct debit and standing order communications When you set up a direct debit for a patient you can get them to sign an agreement, or the mandate for a direct debit.
Document set up
You should create a word document containing the information you want to include on your mandate / agreement.
Your letters should be saved in the appropriate folder ready to be attached in the communications tabs.
You can find the folder location in the “Branches” tab of Maintenance:
... Maintenance - i-Clarity |
||
| Set up clinical exam types You can add different types of supplementary exams. These types are then made available in the non-sight test section of clinical records.
In the “exam types” tab fill in the boxes from left to right as described below:
Type the name of the exam type, E.g. Emergency, in the first box.
Add any notes in the next box.
Check the Def checkbox if this appointment type is the default exam type. If this box is checked, when a non-sight test record is opened this exam type will automatically be selected. Only one exam type can be marked as the default.
Type abbreviation if the exam type in the next box. When you complete a non-sight test exam you will see a list of dates in clinical records to show exam history with the abbreviation show next to the date. In the non-sight test area of the clinical module, you can easily see what each of the exams was by looking at the abbreviations.... Maintenance - i-Clarity |
||
| Setup clinical record templates (general) There are several clinical records in i-Clarity that you can create templates for. You can create as many templates as you need for each section, E.g. you may have a U16 template for your reason for visit section as well as an adult reason for visit template. Similarly, you can create a template for MECS/PEARS in the non-eye exam record as well as a template for a dry eye assessment etc.
An example of the layout of each of the clinical records can be seen in this article so that you can visualise how you may want your templates to look before you start.
Pre-Screen (Pre-screen notes clinical field)
... Maintenance - i-Clarity |
||
| Setup clinical record templates (specific) Users can create personal templates from within the clinical module:
Go to the clinical module:... Maintenance - i-Clarity |
||
| Assign clinical record templates to users Personalised and generic clinical templates made in maintenance module will be available for clinicians to select from within the clinical module when they have appointments. They will need to select the template in each clinical field each time they fill in a new record.
Alternatively, you can personalise the clinical module. You can assign each clinical field a template depending on user. This means when a user opens a new clinical record the template will automatically load the template assigned to that user for that field.
In maintenance go to the user’s tab:
Click on the user you would like to edit. The arrow shows which user you are currently editing.... Maintenance - i-Clarity |
||
| Fast map ethnicity mappings i-Clarity has an extensive list of ethnicities linked to fast map mapping categories, and these can be edited in the Misc. 5 tab of Maintenance:
Select the fast map mapping category from the dropdown list next to the relevant ethnicity.
... Maintenance - i-Clarity |
||
| Renaming 'Other Exam' You can choose what the 'other exams' are known as by typing in the text box in misc. 6 tab of Maintenance:
... Maintenance - i-Clarity |
||
| Edit record warning In the Misc. 5 tab of Maintenance, there is a checkbox called “Warn if Editing Old Record”. If you check this box, when you try to edit an old record, you will receive a warning message. If you leave this unticked, you will not receive a warning when you edit an existing record.
... Maintenance - i-Clarity |
||
| Allow adding clinical record tags on the fly When the list of tag answers comes up in clinical records, the clinician can add an alternative answers in the free text box at the bottom and click “Add This Answer” and the tag answer will then be available in this tag going forward.
On the Misc. 5 tab of Maintenance, there is a checkbox called “Allow Adding Tags on the Fly”.
When this box is ticked, your clinician can add tag answers to the list from the options box
If the box is left unchecked, the clinician cannot add new answers to the list for future use.
... Maintenance - i-Clarity |
||
| Assign default professional fees When a clinician has finished their exam, they are required to assign the correct fee for their appointment. You can set defaults depending on what prescription type is selected. This means that, when the confirmation box appears at the end of a test, the appropriate fee will already be selected.
... Maintenance - i-Clarity |
||
| Logging In To i-Clarity To open i-Clarity double click on the i-Clarity icon on the desktop.
... Main Form - i-Clarity |
||
| How To Change Your Password Open i-Clarity. The following window will appear.
... Main Form - i-Clarity |
||
| Change Users If somebody logs in to i-Clarity and then logs back out, the system will remember who logged in last, if another user wants to log in then they will have to click on the ... Main Form - i-Clarity |
||
| The Main Patient Screen When you first log in to i-Clarity you will land on a blank patient record.
The top section of this screen is where the patient details will be displayed, with the front page displaying the information you will need straight away when opening a record and then further information being displayed on pages behind that. These pages can be accessed by clicking on the tabs across the top of the screen.
The bottom section of the screen is where the patient search fields are located, along with the system navigation buttons.
... Main Form - i-Clarity |
||
| Creating A New Patient Record To create a new patient record firstly click the ‘new’ button, located towards the bottom left of the main patient screen.
This will enter the cursor in the title field.
... Main Form - i-Clarity |
||
| Searching For An Existing Patient Record To make an existing patient’s record active, search for the record and select it from the search results list.
The main search area is located at the bottom of the main i-Clarity screen.
... Main Form - i-Clarity |
||
| Due Date and Recall Communications Located in the middle of the front tab of the patient record is a summary of the patient’s last visits.
... Main Form - i-Clarity |
||
| Patient Activity Notes ... Main Form - i-Clarity |
||
| Adding A Patient Action The 'Patient Activity' tab is split into two sections, the bottom section is used to record items that need to be done in the future e.g. call patient to follow up on new contact lenses or information about the patient that needs to be flagged when they next contact the practice.
Select the date you would like the action to be completed/appear on the action list. You can select the action date by clicking on the arrow next to the date to open a calendar and clicking on the date you would like the action to be done. You can also tick the remove action date box. Ticking this box will remove the date associated with this patient action meaning it will not appear on the action list and it will just pop up when a user opens the patient record.
... Main Form - i-Clarity |
||
| View And Complete Patient Actions The bottom section of the patient activity page is called the patient actions. In this section you can record items that need to be done in the future e.g. call patient to follow up on new contact lenses or information about the patient that needs to be flagged when they next contact the practice.
To access actions assigned to all patients, click the actions button towards the top right of the main patient form. A pink button shows outstanding actions assigned to the logged in user.
... Main Form - i-Clarity |
||
| Examples Of Using The Patient Action Facility General Action
A patient action should be added in this way when you want a note to appear on the action list for a particular day and the patient action can be completed by anyone. For example, please call patient to see how they are getting on with their new contact lens prescription.
Enter the date you would like the action to be completed.
Enter details of the action that needs to be completed.
Depending on the content and importance of the action tick or untick the reminder box e.g. if the patient phones before this date does the staff member talking to the patient need to know this information immediately. If yes, then the reminder box should be ticked.
Click Add.
Personal Action
A patient action should be added in this way when you want a note to appear on your action list for the day. For e... Main Form - i-Clarity |
||
| View Actions To Do On the top right of the main screen is the notification button.
... Main Form - i-Clarity |
||
| Viewing The Action List By default, the action list shows patient actions that are due today or overdue and actions that are assigned to all users and the user logged in.
Actions assigned to the logged in user are highlighted green.
... Main Form - i-Clarity |
||
| Using Analysis Codes On the front of the patient record there is a box which shows the analysis codes selected for this patient. Analysis codes are used as prompts to provide you with key information about the patient or marketing opportunities that patient may present.
These analysis codes are listed in the marketing module and can be used for targeted marketing communications.
... Main Form - i-Clarity |
||
| How To Stop Recall Communications Being Sent To A Patient There are two ways to stop i-Clarity sending recalls to patients.
Method 1
One way to stop i-Clarity from sending recalls to a patient is by ticking the ‘stop all recalls’ box. This can be found on the patients 'Patient Communications' tab.
Whilst this box is ticked no recalls will be sent out from the system.
It is worth noting that this tick box is never automatically unticked by the system. So, all future recalls will be stopped until the box is unticked.
... Main Form - i-Clarity |
||
| How To Stop Marketing Communications Being Sent To A Patient On a patients 'patient communications' tab is a tick box labelled ‘Stop All Marketing’. Ticking this box will stop the patient appearing in the marketing module for all communication types - except when the ‘search patient database’ and ‘ignore communication preference’ options are selected in marketing.
... Main Form - i-Clarity |
||
| Recording That A Patient Has Stopped Wearing Contact Lenses If a patient has stopped wearing contact lenses, you may want to record this without removing their recall history.
You can do this by heading to the patients 'Further Details' tab and locating the tickbox labelled 'CLs Stoped on'.
... Main Form - i-Clarity |
||
| View A Patient's Record History The patient history button shows a grid of the changes that have been made to the patient record. The top line shows the information that was on the patient record before the last change was made, the line below that shows the information on the patient record before the change was made and so on.
You can access the patient history by clicking on the patients 'Further Details' tab and selecting 'Patient History'.
... Main Form - i-Clarity |
||
| Adding to a patients spectacle history The spectacle prescription button brings up a form that allows you to add and then subsequently view spectacle history that is not stored in the patients i-Clarity record. For example, for a new patient you could enter the prescription of a focimetered pair of the patient’s spectacles they purchased elsewhere.
You can access a patients spectacle history by clicking on the patients 'Further Details' tab and selecting 'Spectacle History'.
... Main Form - i-Clarity |
||
| View A Patient's Document History The Document History button, located on the patients 'Further Details' tab, displays a grid of the documents that have been created from or stored against the patient record.
... Main Form - i-Clarity |
||
| Creating Sample Mailmerge Files When creating documents to be used within i-Clarity you are able to use mailmerge fields to include patient specific data. To create these mailmerge links you will need to create a sample merge file which Microsoft Word can use.
To create these files:
Click on a patients 'Further Details' tab. (It does not matter which patient you use but we recommend using a Test patient)
Click on the button 'Create Sample Merge Files'
... Main Form - i-Clarity |
||
| Quick Glance At The Daily Sales Summary It can be good to see how sales are going for the day so far. Located on the patients 'Further Details' tab is a button called 'Sales Summary'.
The sales summary button is a quick way to access the sales summary report, by default it opens with today’s date as the filter so that you can see today’s sales so far.
This sales summary is NOT linked specifically to the selected patient.
... Main Form - i-Clarity |
||
| Anonymise A Patient's Record We do not recommend this is done until the patient record has been transferred into the archive branch.
In a patients 'Further Details' tab, clicking on the 'Anonymise Patient' button will remove all the data from the patient record that makes it identifiable.
... Main Form - i-Clarity |
||
| View A Patient's Appointment Schedule The last tab along the top of the patient record is the appointment tab.
Clicking on this will open the appointment page of the patient record.
Here you will see a list of the appointments the patient has attended in the past, failed to attend or has booked.
This can be useful when you want to see which practitioners the patient has seen or appointment types that patient has had in the past.
... Main Form - i-Clarity |
||
| Why Is The Patient's Name Highlighted In Red or Green? On the patients front screen, you may notice that their name is sometimes highlighted.
The patient name will be highlighted in red if they have an outstanding balance and owe the practice money that needs to be paid for through the point of sale module.
... Main Form - i-Clarity |
||
| Why Is My Patients Date Of Birth Highlighted In Red? On the front screen, the patient name will be highlighted red if the patient is aged under 16.
... Main Form - i-Clarity |
||
| Scroll Through Patient Records On the patients front screen there are 4 arrow buttons which can help you navigate through your patient database.
... Main Form - i-Clarity |
||
| How To Lock i-Clarity ... Main Form - i-Clarity |
||
| Refresh The Patients List When you first log in to i-Clarity a list of the patient records stored within the system will be temporarily downloaded to your computer. This list remains on your computer whilst you are logged in to i-Clarity. This means that the patient search looks through the list on your computer rather than communicating with the server, speeding up the patient search.
Any new patient records that are added after you have been logged in will not appear in the search list. In order to get these patients to appear on the search list you can click the refresh button to redownload a new patient list.
... Main Form - i-Clarity |
||
| Update Products Button i-Clarity downloads a list of products when you log in.
If any amendments are made to the products in i-Clarity during the working day you can either log out and back in to i-Clarity to update your product search list or you can click the update products button on the patients front screen.
... Main Form - i-Clarity |
||
| View Recently Accessed Patients Clicking on the ‘View Recent Patients’ button on the main patient screen will display the last active patient records in the search box.
... Main Form - i-Clarity |
||
| Transfer A Patient Between Branches ... Main Form - i-Clarity |
||
| Merge Duplicate Records ... Main Form - i-Clarity |
||
| The Copy Patient Button This is a useful button when adding more than one family member to i-Clarity.
... Main Form - i-Clarity |
||
| The Family Filter Button ... Main Form - i-Clarity |
||
| The Move Family Button ... Main Form - i-Clarity |
||
| Deleting A Patient Record ... Main Form - i-Clarity |
||
| Navigating Clinical Records To open the clinical module, on the bottom menu bar of the patient record click the ‘Exams’ button.
... Clinical Records - Enterprise |
||
| Charlie's Quick Start Video Guide Watch a short introduction video to guide you through some of the many features of i-Clarity Enterprise.
... General - Enterprise |
 | |
| Working with multiple clinical records i-Clarity has been designed so that you can have two of any clinical record type open at the same time e.g. a previous and new Clinical Record and/or a previous and new CL Clinical Record and/or a previous and new supplementary (non-sight test) record open.
Therefore, if you have chosen to open a previous clinical record you can now open a new clinical record by:
Minimising the previous record you have open, so that the Exam Summary screen is visible again. Then selecting the new record icon.
Dragging the... Clinical Records - Enterprise |
||
| Clinical Screen View Menu i-Clarity Enterprise allows the user to view multiple clinical records at the same time. This menu will give you the ability to select and/or choose the layout you require.
... Clinical Records - Enterprise |
||
| Top Bar Navigation in Clinical Records The top bar within the clinical module bears some resemblence to, but offers additional features to, the bar that is found throughout the main body of the software. Those features are explained below:
The Patient Menu
The patient menu on the clinical record has a header text of the Patient Name, ID, DOB, Age, Last updated date and by who.
From the patient menu you can open the following forms:
The first section of the menu contains features to do with the patient details.- View/Edit Patient will open the front screen of the patient record in a sperate form e.g. Name, DOB, address, and Doctors name. You will also be able to make any necessary amendments to the form.- Recall Communications will open a form showing all the patient communications. It will allow you to add any additional misc recalls you may need the patient to receive. - Activities will allow you to view and add ... Clinical Records - Enterprise |
||
| Zebra barcode label printer not working If your label printer has stopped working, you may be able to fix the issue by using some of the tips below.
Check that the printer is still showing as a printer in the windows settings (Settings > Devices > Printers & Scanners). If it isn't then you may need to reinstall the printer. You can find the correct driver for your model number here: ZD410 ZD410 Desktop Printer Support & Downloads | Zebra
If you are installing/reinstalling a driver, it is recommended that you unplug the printers USB cable from the computer and switch off the printer before starting the install. You will be asked to reconnect it during the install.
Check that there's nothing stuck in the queue that could be preventing new labels from printing.
In windows, navigate to Settings > Devices > Printers & Scanners > ZD... General - i-Clarity |
||
| Receipt printer not working If your receipt printer has stopped working, you may be able to fix the issue by using some of the tips below.
Check that the printer is still showing as a printer in the windows settings (Settings > Devices > Printers & Scanners). If it isn't then you may need to reinstall the printer. You can find the correct driver for your model number here: TM-T88V EPSON Advanced Printer Driver for TM-T88V - Thermal line Printer - Download - POS - Epson (epson-biz.com)
If you are installing/reinstalling a driver, it is recommended that you unplug the printers USB cable from the computer and switch off the printer before starting the install. You will be asked to reconnect it during the install.
Check that there's nothing stuck in the queue that could be preventing new labels from printing.
... General - i-Clarity |
||
| Applying a discount in i-Clarity VIDEO: Applying a discount in i-Clarity
... Point Of Sale - i-Clarity |
| |
| Appointment Waiting Lists in i-Clarity VIDEO: Appointment Waiting Lists in i-Clarity
... Appointment Diary - i-Clarity |
| |
| Booking an appointment in i-Clarity VIDEO: Booking an appointment in i-Clarity
... Appointment Diary - i-Clarity |
| |
| Creating a new clinic in i-Clarity VIDEO: Creating a new clinic in i-Clarity
... Appointment Diary - i-Clarity |
| |
| Creating a new diary template in i-Clarity VIDEO: Creating a new diary template in i-Clarity
... Appointment Diary - i-Clarity |
| |
| Creating a new patient record in i-Clarity VIDEO: Creating a new patient record in i-Clarity
... Main Form - i-Clarity |
| |
| Creating a sale and entering a payment in i-Clarity VIDEO: Creating a sale and entering a payment in i-Clarity
... Point Of Sale - i-Clarity |
| |
| Managing deferred payments in i-Clarity VIDEO: Managing deferred payments in i-Clarity
... Point Of Sale - i-Clarity |
| |
| Taking deposits and pre-payment in i-Clarity VIDEO: Taking deposits and pre-payment in i-Clarity
... Point Of Sale - i-Clarity |
| |
| Dispensing in i-Clarity VIDEO: Dispensing in i-Clarity
... Dispensing - i-Clarity |
| |
| Entering a Contact Lens prescription in i-Clarity VIDEO: Entering a Contact Lens prescription in i-Clarity
... Contact Lens Prescription - i-Clarity |
| |
| Entering a Spectacle prescription in i-Clarity VIDEO: Entering a Spectacle prescription in i-Clarity
... Spectacle Prescription - i-Clarity |
| |
| Features of the i-Clarity Appointment Diary (3 videos) VIDEO: Features of the i-Clarity Appointment Diary
... Appointment Diary - i-Clarity |
| |
| Features of the Point-of-sale system in i-Clarity VIDEO: Features of the Point-of-sale system in i-Clarity
... Point Of Sale - i-Clarity |
| |
| Appointment due dates and recalls, Patient activities, The further details tab and the previous appointments list in i-Clarity VIDEO: Appointment due dates and recalls, Patient activities, The further details tab and the previous appointments list in i-Clarity
... Main Form - i-Clarity |
| |
| Patient Actions in i-Clarity VIDEO: Patient Actions in i-Clarity
... Main Form - i-Clarity |
| |
| Refunds in i-Clarity VIDEO: Refunds in i-Clarity
... Point Of Sale - i-Clarity |
| |
| Searching for a patient record in i-Clarity VIDEO: Searching for a patient record in i-Clarity
... Main Form - i-Clarity |
| |
| Processing spectacle repairs in i-Clarity VIDEO: Processing spectacle repairs in i-Clarity
... Dispensing - i-Clarity |
| |
| Spectacle replacements, remakes and re-dispenses in i-Clarity VIDEO: Spectacle replacements, remakes and re-dispenses in i-Clarity
... Dispensing - i-Clarity |
| |
| Cashing up in i-Clarity VIDEO: Cashing up in i-Clarity
... Point Of Sale - i-Clarity |
| |
| Checking Engish electronic GOS claim status in i-Clarity VIDEO: Checking Engish electronic GOS claim status in i-Clarity
... EGOS - i-Clarity |
| |
| Correcting unlinked English eGOS1 claims in i-Clarity VIDEO: Correcting unlinked English eGOS1 claims in i-Clarity
... EGOS - i-Clarity |
| |
| Sending Marketing Communications in i-Clarity VIDEO: Sending Marketing Communications in i-Clarity
... Recalls and Marketing - i-Clarity |
| |
| The Marketing Module in i-Clarity VIDEO: The Marketing Module in i-Clarity
... Recalls and Marketing - i-Clarity |
| |
| Creating Marketing Communications in i-Clarity VIDEO: Creating Marketing Communications in i-Clarity
... Recalls and Marketing - i-Clarity |
| |
| Contact Lens Clinical Records in i-Clarity VIDEO: Contact Lens Clinical Records in i-Clarity
... Clinical Records - i-Clarity |
| |
| Prescreening in i-Clarity VIDEO: Prescreening in i-Clarity
... Clinical Records - i-Clarity |
| |
| Processing English eGOS3 in i-Clarity VIDEO: Processing English eGOS3 in i-Clarity
... EGOS - i-Clarity |
| |
| Processing English eGOS1 in i-Clarity VIDEO: Processing English eGOS1 in i-Clarity
... EGOS - i-Clarity |
| |
| Signing and Submitting eGOS Claims in Bulk in i-Clarity VIDEO: Signing and Submitting eGOS Claims in Bulk in i-Clarity
... EGOS - i-Clarity |
| |
| NHS Overpayments in i-Clarity VIDEO: NHS Overpayments in i-Clarity
... EGOS - i-Clarity |
| |
| Using an integrated signature pad in i-Clarity VIDEO: Using an integrated signature pad in i-Clarity
... EGOS - i-Clarity |
| |
| Clinical Records in i-Clarity VIDEO: Clinical Records in i-Clarity
... Clinical Records - i-Clarity |
| |
| Unsubscribe Link and Patient Communication Preferences in i-Clarity VIDEO: Unsubscribe Link and Patient Communication Preferences in i-Clarity
... Recalls and Marketing - i-Clarity |
| |
| Managing Practice Tasks in i-Clarity Enterprise VIDEO: Managing Practice Tasks in i-Clarity Enterprise
... General - Enterprise |
| |
| i-Clarity Enterprise i-Clarity Enterprise
... General - Enterprise |
| |
| Creating Gift Vouchers i-Clarity allows you to sell Gift Vouchers to your customers to give to friends and relatives as gifts.
Gift Voucher Set up.
Step 1 Create your gift vouchers using Word, Publisher or similar, including a unique serial number on each one. You can create and sell gift vouchers of multiple denominations, e.g. £10, £25, £50 etc, just make sure that each one has a unique serial number.
Step 2 In the products tab of maintenance create a gift voucher product for each denomination of voucher you have available.
Open the maintenance module of i-Clarity and navigate to the products tab.
... Point Of Sale - i-Clarity |
||
| Selling a Gift Voucher On the ‘Create New Sale’ screen, select the voucher denomination you are selling.
... Point Of Sale - i-Clarity |
||
| Redeeming a Gift Voucher When a recipient comes to redeem their gift voucher, make a sale in the usual way.
When you reach the ‘Enter Payment’ screen select the payment type ‘Gift Voucher’
... Point Of Sale - i-Clarity |
||
| Accounting Implications of Gift Vouchers
When you first sell the gift voucher you will not normally know what it is going to be used for so you cannot really assess the VAT liability. That is why the system requires you to assign any gift vouchers to the ‘Other’ category.
The value of the gift voucher is, however, added to that day’s sales, and of course the money paid will form part of the day’s takings and be included in the cashing up.
When part or all of that gift voucher is redeemed, then a sale is made in the normal way, and added to that day’s sales, and VAT accounted for on the sale in the normal way.
However, to avoid double counting sales (i.e. once when you sold the gift voucher in the first place, and then again when the voucher was redeemed,) i-Clarity creates an additional reverse transaction to the value of the amount of the voucher being used. This is entirely paid off by payment method ‘... Point Of Sale - i-Clarity |
||
| Troubleshooting PDQ Machine (Payment Sense) If you are experiencing issues with a Payment Sense PDQ Terminal (NOT DOJO), the below troubleshooting guide may help to resolve the issue.
Run a test transaction through the training branch after each change.
... Point Of Sale - i-Clarity |
||
| Updating NHS Sight Test Value WE ADVISE NOT TO MAKE THESE CHANGES UNTIL 1st APRIL 2024.
On the 1st April the NHS Sight Test payment will increase to £23.53.
Follow this guide to update the value with i-Clarity or i-Clarity Enterprise
See also > Updating NHS Voucher Values
i-Clarity Instructions
Step 1 - Open the Maintenance module
... EGOS - i-Clarity |
||
| Update NHS Voucher Values WE ADVISE NOT TO MAKE THESE CHANGES UNTIL 1st APRIL 2024.
The NHS voucher values will be increasing from 1st April 2024.
Follow the below guides for updating these values in i-Clarity and i-Clarity Enterprise.
See also > Updating NHS Sight Test Fee Value
i-Clarity Instructions
Step 1 - Navigate to the Maintenance module of i-Clarity
... EGOS - i-Clarity |
||
| Correcting and Amending CL Management Balances (Direct Debit) Patients Direct Debit or Standing order has not been collected
If you receive notification that a patient’s direct debit has not been collected or you see that a patients standing order has not been paid you should record this on the patients contact lens management form.
With the patient record active, open the CL Mgt form.
... Direct Debits/Standing Orders - i-Clarity |
||
| 1.0.99.0 I-CLARITY RELEASE NOTES Build: 1.0.99.0
NEW FEATURES1. Patient Menu; Modal ScreensNow from any patient sub screen (clinical, dispense, sales orders etc) you can open the sales, dispense, orders or direct debit screen modal (as a dialog on top of your current screen).N.B. Not available from the main patient screen.How: Click on the patient menu on the top bar. And select the ‘Modal Screens’ option... Release Notes - Enterprise |
||
| ERROR Message: Incompatible file type and file extension This error occurs when a document is generated through i-Clarity and i-Clarity is set to auto save, when words default file type for saving is not the standard .doc or .docx
To correct the error:
On the computer that presents the error message, open Microsoft Word.
Click on 'File'
... General - i-Clarity |
||
| 1.1.06.0 I-CLARITY RELEASE NOTES Build: 1.1.6.0
CHANGES WORTH NOTING!
1. Predictive Statement FunctionThe predictive statement function was too sensitive to single characters or short words. Therefore the Tab button has replaced the enter button for selecting the first result in the predictive statement list.For example if you wanted to type ‘No’ and enter, previously this would have found predictive statement results and on pressing enter would have entered the first result in the list. Now, typing No and then pressing enter will result in a typed No followed by the return character.Features of predictive statements:• Pressing Tab will populate your text box wit... Release Notes - Enterprise |
||
| The i-Clarity EGOS Process English eGOS Claims follow this process through the i-Clarity system to the PCSE website
Patient claim is created in i-ClarityThis usually happens when the first signature is saved to the claim. For a GOS1 claim this will be the patient's signature for a GOS3 claim this will be the optometrist signature
The claim is then linked to a payment in i-ClarityFor claims to be submitted from i-Clarity to the PCSE website they must be linked to a payment. This means as claims are submitted deferred payments are automatically updated to the status ‘Not yet paid, submitted’
The claim is finalised in i-ClarityAll the necessary signatures and claim info is completed and checked.
The claim is submitted from i-Clarity to the PCSE website.The submit button is clicked on the claim (or in deferred payments) and the claim is submitted to the PCSE Website
... EGOS - i-Clarity |
||
| Write Off, Amend Payment, and Deleting a Transaction (with examples) Errors on the patient account or walk in sale can be corrected using one or more of the following features.
Write Off
The write off button allows you to remove either all the outstanding balance against an individual sale or part of the outstanding balance.
... Point Of Sale - i-Clarity |
||
| Refunds: Create Refund and Refund Partial Sale Refund a Sale in Full.
This method of creating a refund is used if a patient returns a product and is owed a full refund.
Tick the box next to the sale that needs refunding.
Click on Refund Selected Sale
This will open a confirmation window, which also give you the option of returning the product(s) to stock. Click Yes to proceed
A refund for the selected sale will be entered onto the system and the Enter Payments screen will be displayed.
On the Enter payments screen, select the method which is being used to return the payment to the patient.
The amount to be refunded will be shown as a minus figure. Click the Confirm Amount button.
Once the payment information is visable in the bottom box, click Confirm Total.
Enter a reason for the refund. Click OK.
Details of the refund now appear in the sales transaction summa... Point Of Sale - i-Clarity |
||
| Creating, Editing or Deleting a Diary Template To access the diary templates, firstly open the appointment diary.
... Appointment Diary - i-Clarity |
||
| Creating A Single Clinic To be able to book an appointment, a clinic must be set up for the day that your looking to book the patient in.
i-Clarity will not allow you to book a clinic for a user who already has a clinic booked that day but it will allow you to book an AM and a PM clinic separately at the same or different branches.
Creating a Single Clinic
Click on the Appts icon to open the appointment diary.
... Appointment Diary - i-Clarity |
||
| Duplicating A Clinic To be able to book an appointment, a clinic must be set up for the day that your looking to book the patient in.
i-Clarity will not allow you to book a clinic for a user who already has a clinic booked that day but it will allow you to book an AM and a PM clinic separately at the same or different branches.
Duplicating a Clinic
Another way of creating a clinic is to copy an existing clinic to a new date to create a new one. Any appointments booked into the original clinic will not be duplicated but any reserved appointment slots will be duplicated.
In the appointment diary click on the ‘config mode’ button on the right-hand side to switch the diary view into configuration mode.
... Appointment Diary - i-Clarity |
||
| Deleting A Clinic Deleting a clinic
This feature allows you to remove a clinic from the diary.
In the appointment diary click on the ‘config mode’ button on the right-hand side to switch the diary view into configuration mode.
... Appointment Diary - i-Clarity |
||
| Adding an extra appointment to the start or end of a clinic To be able to book an appointment, a clinic must be set up for the day that your looking to book the patient in.
i-Clarity will not allow you to book a clinic for a user who already has a clinic booked that day but it will allow you to book an AM and a PM clinic separately at the same or different branches.
Adding an extra appointment to the start or end of a clinic
In the appointment diary click on the ‘config mode’ button on the right-hand side to switch the diary view into configuration mode.
... Appointment Diary - i-Clarity |
||
| Booking an Appointment Booking an Appointment
Once you have an active patient you can then take them into the appointment diary, to do this you single click on the appointment icon along the bottom of the screen.
... Appointment Diary - i-Clarity |
||
| Moving an Appointment The following process is used when a patient rings up to move their appointment to another time or day.
If applicable this process can be done without changing the current active patient record.
Open the appointment diary.
Navigate to the patient’s appointment.
Single right click on the appointment slot.
The colour of the appointment time will change to a dark green colour to signify that the appointment is in the status of being moved.
... Appointment Diary - i-Clarity |
||
| Cancelling an Appointment The quickest way to cancel an appointment for a patient is to make that patient the active record and then open the appointment diary.
Once in the appointment diary click on the bottom left hand button ‘Go to patient’s next appointment’
... Appointment Diary - i-Clarity |
||
| Generating a Recall Phone List From the Recall Module Using the i-Clarity recall module phone lists
To access the area of the system where recall communications can be sent, click on the yellow arrow on the right-hand side of the module icons at the bottom of the page.
... Recalls and Marketing - i-Clarity |
||
| Sending Recall Communications To access the area of the system where recall communications can be sent, click on the yellow arrow on the right-hand side of the module icons at the bottom of the page.
... Recalls and Marketing - i-Clarity |
||
| 1.1.09.0 I-CLARITY RELEASE NOTES Build: 1.1.9.0
SYSTEM IMPROVEMENTS and CHANGES
1. Performance Improvements
Improved memory management to remove the problems with out of memory that some people were encountering towards the end of the day.
... Release Notes - Enterprise |
||
| Patient Communications Set Up Patient Communication
Before starting this communication section, we recommend that you:
1. Decide on all your recall schemes. This is the expiry date of the patient's prescription and when the patient is due for another appointment.
2. Decide how many stages each of these recall schemes will have. Stages manage the time intervals of the patient’s reminders.
... Recalls and Marketing - i-Clarity |
||
| Issuing an English eGOS3 Voucher to take elsewhere Part 1: Optom Signature
... EGOS - i-Clarity |
||
| Retrieving a Voucher from PCSE Online with a Voucher Code and Authorisation Code This describes the process of being able to retrieve an English electronic GOS3 form that has been generated by another practice.
Click on the 'GOS3' tab at the top of the form.
... EGOS - i-Clarity |
||
| Submitting an uncollected eGOS3 This describes the steps that need to be followed to submit an eGOS3 Voucherfor an order that has not been collected by the patient.
Click the 'Receive' button like you would when the patient does collect and write either ‘uncollected specs’ or ‘uncollected contact lenses’ in the signature box.
Click 'Save' under the signature.
Once checked and ready for submission, click the ‘Submit SP’ button, this will submit the claim for special processing. This means that if the claim has no errors i... EGOS - i-Clarity |
||
| Checking eGOS Claim Status This describes the possible processes for checking eGOS claim status and rejected claims.
Checking the status of an individual claim
The status of a claim can be checked from an individual's claim module, however this is not a recommended process for daily checking of all the submitted claim statuses.
Open the patient record of the claim you would like to check the status of.
Click on the ‘Px Claims’ button.
... EGOS - i-Clarity |
||
| Checking the Contact Lens Expired Report This explains how to check the Contact Lens Expired Report
Click on the yellow arrow at the bottom right of the screen to navigate to the admin icons.
... Direct Debits/Standing Orders - i-Clarity |
||
| Paying Off a CL Mgmt Balance by Cash/Card/Cheque - Cash Accounting This describes a possible process for paying off a Contact Lens Management Balance by Cash or Card or Cheque. The process described below is more suitable when you are using cash accounting.
You may need to use this process if a Direct Debit or Standing Order payment was missed, the patient needs to pay off a balance or you are changing the patie... Direct Debits/Standing Orders - i-Clarity |
||
| Processing English eGOS3 Claims This describes a possible process for the journey of English electronic GOS3 forms within a practice using i-Clarity.
It was envisaged that most of the time the GOS3 claim will be started by the optometrist after they have signed the GOS1.
Part 1: Optom Signature
After completing the GOS1, click on... EGOS - i-Clarity |
||
| Calibrating the Zebra ZD-410 Calibrating the Zebra ZD-410 Label Printer
... Stock - i-Clarity |
||
| Processing English eGOS4 Claims This describes a possible process for completing eGOS4 claims in i-Clarity. It is broken down into five parts.
Part 1: The dispense or sale
Part 2: The initial patient signature
Part 3: The repair information
Part 4: The patient receive signature
... EGOS - i-Clarity |
||
| Supervising an i-Clarity Clinical Record This looks at opening both the Supervisor Notes program and i-Clarity.
Open your 'Supervisor Notes' program
Double click on the 'Supervisor Notes' icon on your desktop.
... Clinical Records - i-Clarity |
||
| Additional Features of the Contact Lens Order Process This looks at the additional features of the contact lens ordering process.
Confirm - Don't Pay By by DD/SO
The 'Confirm - don't pay by DD/SO' button appears when you click the 'Lenses Collected' button for a patient who has a recurring supply of products set up.
... Contact Lens Ordering - i-Clarity |
||
| Cashing Up The i-Clarity cash up module has been designed with flexibility in mind. Cashing up can be done at the end of the day or can be done on the following morning. Even though it is recommended that you cash up at the end of each day that the practice is open, the cashing up module will accommodate a day being missed.
When you open the cash up module, it will display the last cashing up completed. Not until you click begin cashing up will you be able to enter the final takings and float for the day. However, at any point during the day you can add the following entries on to the cashing up module:... General - i-Clarity |
||
| Contact Lens Clinical Record The i-Clarity Clinical Records module consists of 4 record types: Pre-Screening, Clinical Records, CL Records and Non-Sight Test (Other).
Contact Lens Clinical Record
The Contact Lens Clinical Record form is intended to record the clinical notes of any exam related to a contact lens appointment.
There are several text fields throughout the form, that can be completely blank so that you can free type whatever you want into it.... Clinical Records - i-Clarity |
||
| Contact Lens Trials This will explain the process of ordering contact lens trials for a patient.
The Contact Lens Trials form can be accessed through either the CL Rx form or the Clinical Contact Lens form.
... Contact Lens Ordering - i-Clarity |
||
| Direct Debit/Standing Order Mandates Direct Debit and Standing Order Mandates can be used to record money collected from patients for 3 different reasons:
To pay for products and services that you supply on a regular basis e.g. contact lenses or monthly aftercare fees – this is referred to as ‘Product Supply’.
To pay for products purchased on credit e.g. patient is paying for spectacles over 3 months – this is referred ... Direct Debits/Standing Orders - i-Clarity |
||
| Deferred Payments A deferred payment is used when a sale is put on the patient account but the payment for all or part of that sale is not expected to be paid for by the patient. Payment is expected from a 3rd party at a later date, once a claim or invoice is processed.
The main use of this feature will be GOS1 claims for sight test and GOS3 and 4 claims for spectacles. It may also be used for local schemes, such as PEARS/MECS/WECS or for corporate companies paying for employee sight tests.
... Point Of Sale - i-Clarity |
||
| Deposits and Pre-Payments ... Point Of Sale - i-Clarity |
||
| Dispensing In i-Clarity The dispensing module can be opened in two ways.
1.By clicking on the 'Dispense' icon at the bottom of the screen.
... Dispensing - i-Clarity |
||
| Dispensing With An NHS Voucher Assigning an NHS Voucher to a Dispense
The dispensing module in i-Clarity allows you to assign an NHS voucher to a dispense. This will then reduce the amount shown that the patient must pay. Once the dispense is confirmed then the dispense will be entered onto the patient account with a voucher already assigned to the sale.
On the 'Dispense' module, select the voucher the patient is entitled to from the voucher drop-down.
... Dispensing - i-Clarity |
||
| Entering A Contact Lens Prescription The principle behind contact lens prescriptions and sales in i-Clarity, is that contact lenses are arranged in ‘Brands’ and each brand is associated with one or more specific products. A brand is specified by the manufacturer itself.
For example: Johnson & Johnson own a brand called ‘1-DAY ACUVUE MOIST'.
... Contact Lens Prescription - i-Clarity |
||
| Entering A Spectacle Prescription If you are not using the i-Clarity clinical records, then prescriptions for a patient are entered in the Rx area. If you are using clinical records, then a summary prescription will be automatically created in this form so that it can be viewed by the front of house team. You would also use this form to enter prescriptions from elsewhere.
Freatures of the Patient Prescription Form
... Spectacle Prescription - i-Clarity |
||
| Dispensing in Enterprise The Dispensing Module
... Dispensing - Enterprise |
||
| Navigating the Practice Orders Module in Enterprise Navigating the Practice Orders Module
... Dispensing - Enterprise |
||
| The Dispensing Module Summary Screen in Enterprise The Dispensing Module Summary Screen
... Select Category - Select Software Version |
||
| Generating a Printed Spectacle Order in Enterprise Generating a Printed Spectacle Order
... Dispensing - Enterprise |
||
| Dispensing With An NHS Voucher in Enterprise Dispensing With an NHS Voucher in Enterprise
... Dispensing - Enterprise |
||
| Dispensing Multiple Pairs of Spectacles in Enterprise Dispensing Multiple Pairs of Spectacles in Enterprise
... Dispensing - Enterprise |
||
| Dispensing a Pair of Spectacles in Enterprise Dispensing a Pair of Spectacles in Enterprise
... Dispensing - Enterprise |
||
| Family Payments The ‘Family Payments’ feature allows you to create a running total of payments made for different patients and different sales transactions. E.g. if Mum wants to pay for her glasses, and then her children’s glasses, the system will keep a running total of the amount she is going to pay.
Please note: family payments will total outstanding balances from the patients you allocate in the payment screen, it is not specific to patients that appear together when the family filter button is selected.
... Point Of Sale - i-Clarity |
||
| Features Of the Appointment Diary Reserving Appointment Slots
Reserving appointment slots will mark an appointment slot with the text ‘Reserved’ or a line of text of your choice. It is a feature that can be used in many different scenarios.
Some examples:
·... Appointment Diary - i-Clarity |
||
| Front Page Features These are the main features of the front page:
Branch name
The name of the branch you are logged in to will be displayed in the top left-hand corner of i-Clarity.
... Main Form - i-Clarity |
||
| More On The i-Clarity Patient Record Due Date and Recall Communications
Located in the middle of the front tab of the patient record is a summary of the patient’s last visits.
... Clinical Records - i-Clarity |
||
| Non-Sight Test Clinical Record The i-Clarity Clinical Records module consists of 4 record types: Pre-Screening, Clinical Records, CL Records and Non-Sight Test (Other).
Non-Sight Test
The Non-Sight Test form is intended to record the clinical notes of any exam that does not require a refraction. For example, it can be used for Dry Eye Assessments, Red Eye Emergencies etc.
Non-Sight Test Form Features
To open the Non-Sight test form, click the on the 'Clinical... Clinical Records - i-Clarity |
||
| Integration with Payment Sense PDQ Machines With payment sense integration, amounts entered onto i-Clarity to be paid for by card are automatically transferred to the PDQ machine. Therefore, there is no need to enter an amount twice e.g. once onto i-Clarity and once onto the card machine.
On the ‘Enter Payment’ Screen, select a card payment method.
... Point Of Sale - i-Clarity |
||
| Pre-Screening and Clinical Records The i-Clarity Clinical Records module consists of 4 record types: Pre-Screening, Clinical Records, CL Records and Other.
Note that patient information in the Clinical Records module is more sensitive than that stored in other parts of the system. It is strongly recommended that you use Maintenance/Form Permissions to create a user group for registered staff. You can then assign your professional staff to that group and ensure that only they have access to the full clinical records forms (CL Clinical Records, Clinical Records and Other Exam).
... Clinical Records - i-Clarity |
||
| Processing a Spectacle Order The Spectacle order form for a patient can be opened by clicking on the 'Orders' icon at the bottom of the main patient form.
... Dispensing - i-Clarity |
||
| Patient Requests a one-off supply of lenses Click on the ‘CL Dispense’ button located on the bottom bar of the patient form.
... Contact Lens Ordering - Enterprise |
||
| Processing English GOS1 Claims This describes a possible process for the journey of English electronic GOS1 claim forms within a practice... EGOS - i-Clarity |
||
| Spectacle Remakes, Re-dispenses and Replacements Replacement Spectacles
This process can be used to order an exact replacement of a previous order.
1. Open the dispense form for the relevant patient.
2. The 2nd drop-down at the top shows previous confirmed dispenses.
... Dispensing - i-Clarity |
||
| Processing Repairs Setting Up Your System To Process Repairs
In order to use the below worked examples as a basis for how you will process repairs through your i-Clarity, you should have the following set up in the maintenance of your system.
1. An adjustment reason called 'Frame front only'.
... Dispensing - i-Clarity |
||
| Setting up a DD Bottomline Mandate Mandates are created and maintained using the Mandate Maintenance form in the CL Management form.
Open the CL Management form by clicking on the 'CL Mgmt' icon.
... Direct Debits/Standing Orders - i-Clarity |
||
| Setting Up A Patient On A Lens Plan Fee Paid by DD/SO Step 1: Set Up The Recurring Lens Plan Charge
Open the CL Mgmt form for the patient.
... Select Category - Select Software Version |
||
| Staff Rota The i-Clarity staff rota links to the appointment diary. Staff members who have a clinic added to the diary will automatically have an entry created in the rota, unless it was done in advance of the clinic creation.
Preparing To Use The Staff Rota
Rota... Staff Rota - i-Clarity |
||
| The Contact Lens Order Process The principle behind contact lens prescriptions and sales in i-Clarity is that contact lenses are arranged in ‘brands’ and each brand is associated with one or more specific products. A brand is specified by the manufacturer itself.
For example: Johnson & Johnson own a brand called ‘1-DAY ACUVUE MOIST'.
Within i-Clarity, when you create a new CL prescripti... Contact Lens Ordering - i-Clarity |
||
| The Marketing Module To access the marketing module, click on the yellow arrow on the right-hand side of the module icons at the bottom of the page.
... Recalls and Marketing - i-Clarity |
||
| The Point Of Sale Module i-Clarity has two Point of Sale forms.
1. The Patient Account - This is accessed by ensuring the patient you would like to process a sale or payment for, is active on the screen and then by clicking the 'Px Sale' icon.
... Point Of Sale - i-Clarity |
||
| The Stock Module and Stock Control The stock module is accessed by clicking on the yellow arrow pointing to the right to display the 2nd set of icons.
... Stock - i-Clarity |
||
| 1.1.15.0 I-CLARITY RELEASE NOTES Build: 1.1.15.0
Enhancements
1. Appointment Diary Filter
The staff member filter has been enhanced to separate names with upcoming clinics from others with no future clinic.
Reason: To make is quicker and easier to find the correct name when filtering the diary.
... Release Notes - Enterprise |
||
| Transferring A Super Saver Balance To Another Patient This details how to transfer one patient's super saver balance to another patient to pay for an order.
Search for the record of the patient you wish to transfer the balance FROM.
Click on the CL Mgmt button at the bottom of the screen.
... Direct Debits/Standing Orders - i-Clarity |
||
| TECHNICAL TIP: Choosing the best move appointment method In i-Clarity, there are two primary methods to move an appointment, depending on the time gap between the original and new appointment. Selecting the appropriate method ensures an efficient process.
Method 1: Short Time Gap
Use this method when the new appointment is scheduled within a short period from the original time.
Use cases:
The patient reschedules for later the same day.
The patient's appointment is moved to another clinic on the same day.
The patient's appointment is relocated to another clinic that is also visible on the appointment diary for,
Method 2: Long Time Gap
... Technical Tips - Enterprise |
||
| Why would a stock movement be highlighted in pink? Stock movements are highlighted in pink when there is a note attached to them... Technical Tips - i-Clarity |
||
| Can I upgrade to i-Clarity Enterprise? Yes! Please contact us to arrange a demo of our latest release and arrange installation in your practice.... Technical Tips - i-Clarity |
||
| I-CLARITY ENTERPRISE RELEASE NOTES Beta Build 1.1.19.0 30/07/2024 Enhancements
A stored patient portrait will now display on the main patient record.... - Enterprise |
||
| Features of the Document Centre The i-Clarity Document Centre is a new form within i-Clarity that provides a new interface to viewing patient documents stored and saved against the patient record.
This means the patient document folder will rarely need to be directly opened.
The patients document centre can be opened from the patient menu, Top bar document count and dynamic bar document count. It can also be launched by pressing the F9 key on the keyboard.
Opening the document centre from the patient record or all non-clin... General - Enterprise |
||
| I-CLARITY ENTERPRISE RELEASE NOTES Beta Build 1.1.20.0 27/08/2024 Enhancements
Baroness now an option in the patient title.
A new text field has been added above the CL Rx. ‘Lenses for:’ Allows for a description of what the lenses are required for e.g. regular wear, dailies for holiday.... - Enterprise |
||
| 1.1.22.0 I-CLARITY ENTERPRISE RELEASE NOTES - The document center update! Build: 1.1.22.0
Release Date: Evening of 28/08/2024
Enhancements
A stored patient portrait will now display on the main patient record.... Release Notes - Enterprise |
||
| Stock Take (Reconcile Stock) - Enterprise Enterprise – Stock Take (Reconcile Stock)
Reconciling stock in Enterprise will require you to list all the products in your practice (you can do this in different product groups to make this process more manageable). When complete, Enterprise will compare this list you have created with the current stock values on Enterprise and make any necessary adjustments.
Use the Enterprise menu to open the Stock module.
... Stock - Enterprise |
||
| How do I change my password in i-Clarity? If you already know your password but would like to change it, load up i-Clarity and on the opening screen, click the ‘Change Password' button.
... General - i-Clarity |
||
| How do I change my password in Enterprise? If you already know your password but would like to change it, load up i-Clarity and on the opening screen, click the ‘Change Password' button.
... General - Enterprise |
||
| What do I do if I have forgotten my password (i-Clarity)? If you have forgotten your password, you will need to ask someone with Maintenance access (e.g. a manager), to change the password for you.
The person with Maintenance access, will need to click on the Maintenance tab at the bottom of the screen.
... General - i-Clarity |
||
| What do I do if I have forgotten my password (Enterprise)? If you have forgotten your password, you will need to ask someone with Maintenance access (e.g. a manager), to change the password for you.
The person with Maintenance access, will need to click on the button at the top right-hand of the screen and then click on the Maintenance button.
... General - Enterprise |
||
| Moving Appointments in Enterprise There are a few ways to move an appointment in Enterprise. The first way is -
Go to the Appointment Diary.
... Technical Tips - Enterprise |
||
| Managing Notifications in Enterprise In Enterprise, you can manage your notifications and how they pop up on your screen.
Click on the Menu at the top right of the screen and click on ‘Personal Display Options’.
... Technical Tips - Enterprise |
||
| Diary View When Filtering By Optom in Enterprise Open the Diary Screen.
... Technical Tips - Enterprise |
||
| 1.1.28.0 I-CLARITY ENTERPRISE RELEASE - The reserve appointment release! Build: 1.1.28.0
Release Date: Monday 30th September (Evening)
Enhancements:
New "Actions" button on the appointment booking form. This button allows you to return to a booked appointment and resend appointment confirmations.... Release Notes - Enterprise |
||
| Changing the size of the window in Enterprise Open i-Clarity and adjust the window to the size you want it to be.
... Technical Tips - Enterprise |
||
| Enterprise Guide to Navigation and Patient Records Enterprise Guide to Navigation and Patient Records
Transcript of Video:
Hi guys its Harry from i-Clarity here and this video is a guide to i-clarity Enterprise for dispensers. If you have already watched the front of House or Optometrist guides you can skip ahead to the time stamp on screen for new information.
We begin on the login screen, login is done with just a password which identifies who the user is.
When we enter into i-clarity we are met with a home screen, this home screen can be customised with your practice logo and can be accessed at any time when you are... Main Form - Enterprise |
| |
| Enterprise Guide for Front Of House Roles Enterprise Guide for Front Of House Roles
Transcript of Video:
This video we will be looking at the Diary, GOS 1 claims, C/L dispense, sales, orders and cashing up.
To navigate to the diary simply click the calendar in the top right section of buttons. This opens up the diary as a completely separate window to our main i-clarity the has the patient records on.
The diary has its own patient search functionality separate to that in the main i-clarity. Meaning whilst working on something for one patient and then another patient wis... General - Enterprise |
| |
| Enterprise Guide for Optometrists Enterprise Guide for Optometrists
Transcript of Video:
This video we will be looking at Clinical Records, both sight test and contact lens, ordering trial contact lenses and GOS1s
To access clinical records click exams in the bottom bar.
This takes us to the exam summary screen; this is an overview of previous clinical records, we can see all previous clinical records and prescriptions, these can be opened to view via right clicking and pressing open exam.
Below is the actions bar that allows you to open new clinical records.
B... Clinical Records - Enterprise |
| |
| Enterprise Guide to Dispensing Enterprise Guide to Dispensing
Transcript of Video:
This video we will be looking at Dispense, sales, orders and GOS 3 claims.
Clicking on dispense we go into a dispense overview that will list previous dispenses put on to i-clarity and any quotes the patient may have been quoted. This allows the dispenser to make an informed decision about whether they wish to start a new dispense or continue a previously quoted one, from this page we can also right click any of the previous dispenses and repeat them which will load up the information as a new dispense, or we can open the dispense which will allow us to open that previously dispensed pair o... Dispensing - Enterprise |
| |
| How to install the i-Clarity Enterprise System After clicking on the installation link provided, you will be navigated to the i-Clarity program download page.
Click on the Blue 'Download the latest version of i-Clarity Enterprise' Button
... General - Enterprise |
||
| Technical Tip: Choosing the best appointment booking method by scenario Method 1: Booking an Appointment for the active patient record
Use Cases:1. The patient has given you their name in advance of discussing appointment dates and time.
Steps:
1. If you do not already have the patient record open, click into the search box
... Technical Tips - Enterprise |
||
| Adding a new frame to the stock module. To open the stock module, click on the ‘Back Office & System’ Modules icon on the top bar.
... Stock - Enterprise |
||
| Reprinting a frame barcode label Firstly select the frame you require a new barcode for.
In the top left of the stock module, click the 'Select Frame or Sunspec' button
... Stock - Enterprise |
||
| Adding images to email communications You may wish to add images to your email communications such as your email footer, appointment confirmations, ad hoc and marketing communications.
To do this you need to upload your image to your website, or an alternative image hosting website. Your image should then be reachable from any web browser using an address such as: 'https://www.opticianwebsite.co.uk/images/myimage.jpg'.
Inserting an Image using the WYSIWYG editor.
If you are using the WYSIWYG (What you see is what you get) editors to create your document then you can select 'Insert > Image' as per the screenshot below.
... General - i-Clarity |
||
| Enterprise Tips: Practice Tasks VIDEO: Enterprise Tips: Practice Tasks
Practice tasks allow you the ability to assign one off or recurring tasks not related to a specific patient but rather the practice. They can then be completed by a member of the team to add accountability to the task.
To add a practice task click the dashboard button
Access your actions and tasks
Here the top section is devoted to practice tasks and the bottom is patient actions.
To add a practice task click “add practice task” enter the relevant notes for the task
Select whether this is a one of task or recurring,
If re... Technical Tips - Enterprise |
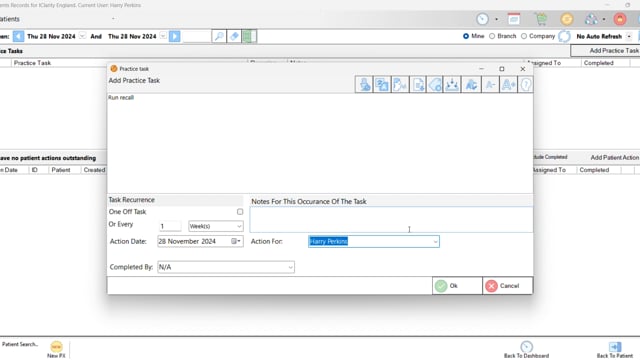 | |
| Enterprise Tips: Additional Contact Lenses VIDEO: Enterprise Tips: Additional Contact Lenses
Within a patients contact lens clinical record you can add multiple CLs prescriptions, whether that be trials or additional contact lens prescription in addition to the primary prescription allowing you to stack them up to be dispensed through the contact lens dispensing module.
They can be added one of three ways.
Copying from the previous prescriptions, all of which can be copied over as a contact lens prescription regardless of whether it is a contact lens prescription or not. Simply right click and copy as new trial lens, this ... Technical Tips - Enterprise |
 | |
| Enterprise Tips: Voice to Text & Translation VIDEO: Enterprise Tips: Voice to Text & Translation
i-Clarity features the ability to use voice to text in any smart text box.
Smart text box can be identified by the icons at the top of the text box that allow additional features. One of these features is Voice to text.
Simply click the microphone icon and then begin speaking.
Once you have begun speaking your computers microphone detects what your saying and once you stop speaking it’ll be translated to text in the text box.
This a handy way of entering notes that are more conversational or d... Technical Tips - Enterprise |
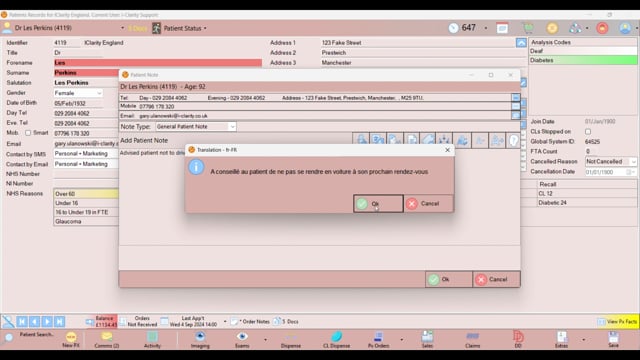 | |
| Enterprise Tips: Templates in Text Boxes VIDEO: Enterprise Tips: Templates in Text Boxes
You can now populate any smart text box with a either a personal or generic template.
Smart text boxes can be identified by the buttons at the top of the box which allow for additional features.
To enter a template click the document with an arrow icon. This loads your templates list.
Select whether you wish to view “my templates” or “generic”
The choose your template of choice.
You can then choose whether you wish to overwrite the text that is currently in the box or by unselecting ... Technical Tips - Enterprise |
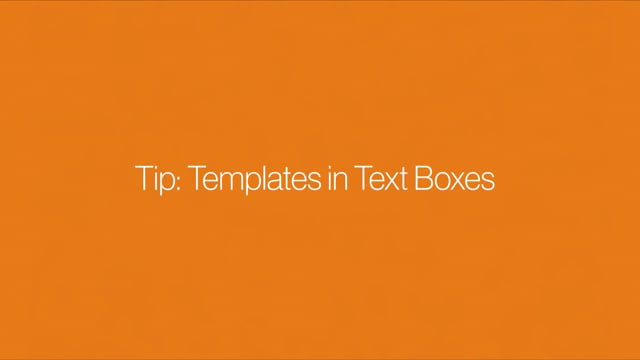 | |
| Enterprise Tips: Sidebar VIDEO: Enterprise Tips: Sidebar
i-Clarity has a sidebar that can sit alongside your patient records and be tailored to display information that best suits the users needs.
To show this side bar click “user options” then “show side bar”
We can select whether we want the side bar to be on the left or the right with the docking button, this switches the side bar from one side to the other. Or should you want it somewhere else, you can unlink from the side of your i-clarity to move it somewhere else, for example on another screen.
This side bar can sit alongside your i-clarity and h... Technical Tips - Enterprise |
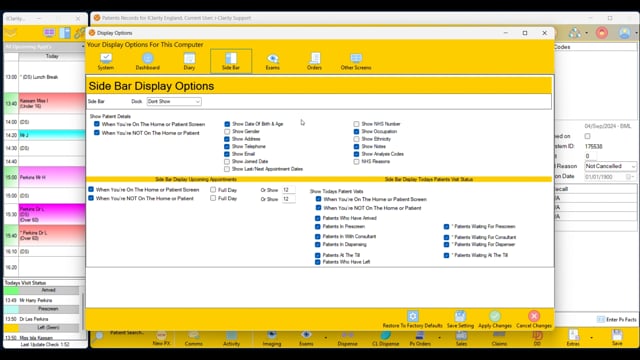 | |
| Enterprise Tips: Sorting Deferred Payments by First Name VIDEO: Enterprise Tips: Sorting Deferred Payments by First Name
You can sort your deferred payments by first name to match the remittance spreadsheet received by PCSE.
First set your date ranges so they match that of the ranges in the spreadsheet. This will mean that the selection when sorting should very closely resemble the spreadsheet.
Now click the first name heading within the deferred payments table.
Your deferred payments are now sorted by first name and should be easier to reconcile your remittance that can also be alphabetised by first name with... Technical Tips - Enterprise |
 | |
| Enterprise Tips: Profile Pictures & Patient Portraits VIDEO: Enterprise Tips: Profile Pictures & Patient Portraits
Within i-clarity you can upload pictures from your PC to act as your profile picture or if you take images of your patients you can have them as patient portraits.
To upload a profile picture
Click user options
Change your profile
Enter your password
Press select
Now find your picture in your windows explorer and press open
This is now set as your profile picture and will be displayed in the top right hand corner whilst logged into i-clarity.
A profi... Technical Tips - Enterprise |
 | |
| Enterprise Tips: Right Click for Data Entry VIDEO: Enterprise Tips: Right Click for Data Entry
While all prescription and measurements boxes can be entered via the keyboard you can also enter measurements by right clicking on the box and selecting from the option available.
All boxes have the relevant measurements available on right click, for example prescription boxes all have the relevant data formatted correctly. As do the measurements in dispense.
One particularly useful place is the “order options” which gives measurements in their correct format when right clicking.
Meaning lenses that need ... Technical Tips - Enterprise |
 | |
| Enterprise Tips: Predictive Statements VIDEO: Enterprise Tips: Predictive Statements
Predictive statements allow you to create tailored databases within each smart text box in i-clarity.
Smart text boxes can be identified by the buttons at the top of the box which allow for additional features.
One of the primary features of any smart text is predictive statements. These are statements that will load at the bottom of the box to be selected when typing.
These predictive statements are tailored to the user in the box you are leaving them, meaning that users can have their own individual custom statements and tha... Technical Tips - Enterprise |
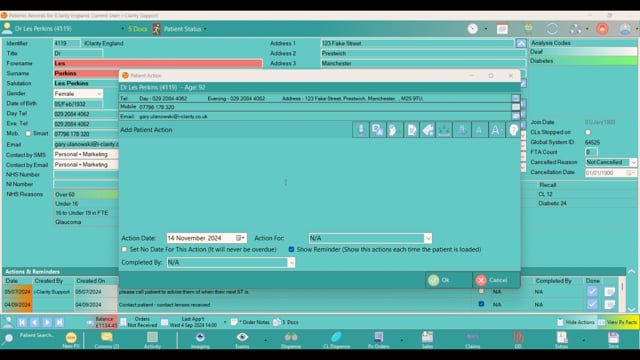 | |
| Enterprise Tips: Close and Go Buttons VIDEO: Enterprise Tips: Close and Go Buttons
Close and go button are found throughout i-clarity offering a seamless way of transitioning from one module to another without the need to manually find it yourself.
Meaning you can build in your own workflows when acting on specific tasks that require multiple modules.
In any module within a patients record you will be afforded the ability to either Close the module with the Close button, this closes the screen and takes you back to the patient record.
The Go button however offers you the ability to move to another part of the ... Technical Tips - Enterprise |
 | |
| Enterprise Tips: Appointment Search VIDEO: Enterprise Tips: Appointment Search
Along with the drag and drop feature of booking an appointment you also have the ability to do an appointment search. This appointment search feature filters the diary and makes finding an appointment for the patient quicker.
First, search for the patients name in the diary search. Now right click their name and select “appointment search”.
This adds an extra column to the left hand side of the diary. From here you can filter the appointments presented to an individual optom if the patients requests to see an particular member o... Technical Tips - Enterprise |
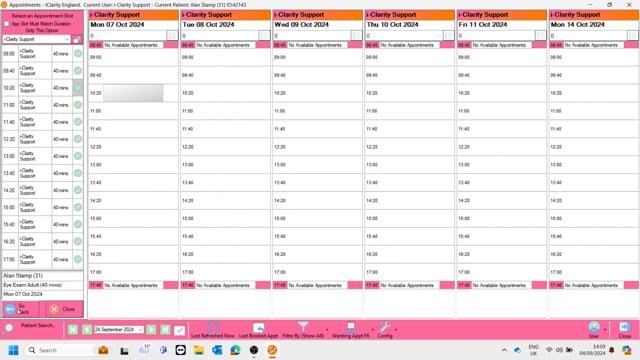 | |
| Enterprise Tips: Adding Stock and Frames in Dispense VIDEO: Enterprise Tips: Adding Stock and Frames in Dispense
From the dispensing module you can adjust stock and enter new frames.
While in dispense when selecting the frame you are told whether it is in stock or not. If not,
Find the frame, in choose frame,
Select the frame and then you have the button add to stock, and you can choose the quantity you wish to add.
Great for instances you are about to dispense a frame but are told it isn’t in stock but you know you have it.
Or it can be used as a means to negate having to adjust the stoc... Technical Tips - Enterprise |
 | |
| Enterprise Tips: Adding an Action through Deferred Payments VIDEO: Enterprise Tips: Adding an Action through Deferred Payments
When viewing the list of patients in deferred payments you can right click any of the patients and add an “action” without having to navigate to the patients record to do so.
Useful if you need a particular user to sign the claim, outstanding signatures can be seen in the signature status column.
Or if you need someone to action something when the patients picks up their specs.
As an aside if you need to view any of these patient records for any reason, you can do so by rig... Technical Tips - Enterprise |
 | |
| Enterprise Tips: Multiple Reports and Maintenance Tabs VIDEO: Enterprise Tips: Multiple Reports and Maintenance Tabs
Maintenance and Reports can be opened separately to your i-clarity patient records meaning, administrative tasks don’t need to be interrupted if something patient specific needs addressing.
Along with having reporting and maintenance open separately you can also run multiple reports at the same time.
Simply click another report to run and it will open up as separate window. Or you could even run multiple reports of the same type if you so wish. This is useful when comparing data within reports or ... Technical Tips - Enterprise |
 | |
| Enterprise Tips: Modules Screens VIDEO: Enterprise Tips: Modules Screens
Whilst in a module you have the ability to view other modules and load them up as a separate window.
To do so while in any patient specific module, click the patients name at the top to access the patient menu.
Highlight modules screens,
We now have the ability to access the patients sales, dispense, orders and direct debits.
As stated we can do this from any patient specific module.
For example while in a clinical record you may want to access orders to see what spectacle lenses or contact lenses a patient has had before.... Technical Tips - Enterprise |
 | |
| Enterprise Tips: Linking Websites VIDEO: Enterprise Tips: Linking Websites
You can link websites to your i-clarity for quick access while in the system.
To so click “User options”
Hover over “linked programmes and websites” and then click “Add new link”
In this screen we can then select the link type i-clarity also has the ability to open external documents and apps.
Select website
Choose how you want this link to appear in your linked websites menu.
Now paste the website address into the Path/URL box
You can then choose whether you want this ... Technical Tips - Enterprise |
 | |
| Enterprise Tips: GP Lookup VIDEO: Enterprise Tips: GP Lookup
Along with your own hosted list of GPs you now have the ability to look up GP practices that may not be part of your current selection. To do so click the button to the left of the GP drop down list
This loads up a new page, from here you can search the i-clarity community database with up to three keywords at the top, for example this could be the name of the town, street or practice name, you can also search any of the countries or locations listed in the drop down to the right.
After searching for the keywords you’ll be presented with a list of matc... Technical Tips - Enterprise |
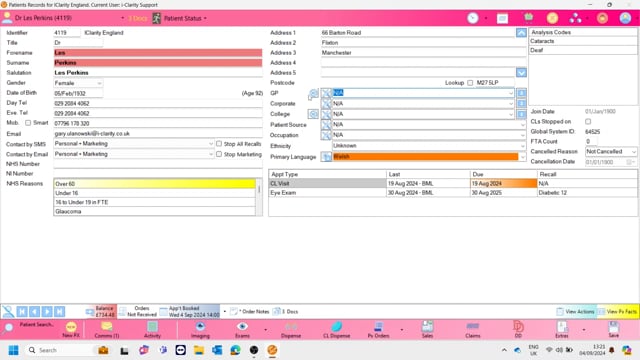 | |
| Enterprise Tips: Linking Documents to Clinical Records VIDEO: Enterprise Tips: Linking Documents to Clinical Records
You can link documents with specific clinical records making it easier to track which document references which visit the patient paid to the practice.
To do so first open the clinical record you wish to link the document with.
Now click the patient menu in the top left and open the document centre
Now you can either drag the document into the centre or press select and store, select your file from your file explorer and then save it the patients document centre.
This file is now linked ... Technical Tips - Enterprise |
 | |
| Enterprise Tips: Frame and Lenses Order Search VIDEO: Enterprise Tips: Frame and Lenses Order Search
Within the “all practice orders” summary you can search for any information that can be found in the row of the order.
The most obvious use case of this would be searching for the patient name or order number. But you could also use it for searching for a frame, if for example one has arrived without a reference and you are trying to work out who it is for.
You can search the different order statuses by typing into the orders search box in the bottom left and this will show orders within that status that ma... Technical Tips - Enterprise |
 | |
| Enterprise Tips: F Keys VIDEO: Enterprise Tips: F Keys
Each of the F keys on your keyboard allows for quick access to a different part of the system. Lets go through them
F1 – Bring up the support centre to send a message directly to the support team
F2 – Brings up the maintenance module
F3 – Presents reports
F4 – Prints any receipts in the queue
F5 – is a quick link to the diary
F6 – Bring ups the sidebar with your chosen widgets
F7 – Brings up the sidebar with the translation window
F8 – Quick access to personal display o... Technical Tips - Enterprise |
 | |
| Enterprise Tips: Colour and Button Customisation VIDEO: Enterprise Tips: Colour and Button Customisation
i-Clarity can be customised to suit your viewing preferences should there be a colour scheme you find easier to read and navigate.
To change this… Click user options > Personal display > System > And then change the colour themes,
Click the top most colour theme and then press the down key on your keryboard to scroll through the options. Once you find a colour scheme you like click save settings and then apply changes.
With each user being able to set their own colour scheme this is a great ... Technical Tips - Enterprise |
 | |
| Enterprise Tips: Increase Font Size VIDEO: Enterprise Tips: Increase Font Size
One of the many customisation options i-clarity features is the ability to customise font size.
You can customise the text size of any smart text box.
Smart text boxes can be identified by the buttons at the top of the box which allow for additional features.
To increase or decrease their size click the relevant buttons in the top right of the text box.
This can be done per text box to truly customise your viewing needs.
You can globally increase the size of text boxes by going nto “user options” hover ov... Technical Tips - Enterprise |
 | |
| Enterprise Tips: Print Px Slip in Orders VIDEO: Enterprise Tips: Print Px Slip in Orders
From within patient and practice orders you can print a patient slip.
Simply right click an order and select patient slip, the relevant patient slip will print to your receipt printer.
This is useful if you wish to cut down on paper as you can order lenses or contact lenses by referencing i-clarity on your PC rather than printing out an order sheet, then print out just a px slip to match against the order when it arrives and is awaiting the patient picking them up.
With the ability to view all the practice orders and now p... Technical Tips - Enterprise |
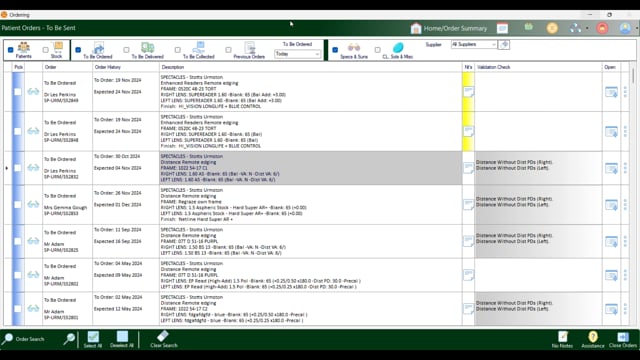 | |
| Enterprise Tips: Medication Look Up VIDEO: Enterprise Tips: Medication Look Up
You can look up any entered information directly from i-clarity on one of three websites. This being the NHS website, Drugs.com and the Medical dictionary.
Simply highlight the text you want to search, right click this highlighted text, you then have the option of which site to look up this text on.
Clicking on any of these options will search for that term on the website of your choosing.
This is particularly useful for medication in your prepopulated medications list.
This streamlined access to trusted medical resources en... Technical Tips - Enterprise |
 | |
| 1.1.31.0 Notes for the upcoming i-Clarity Enterprise Release - The Dispensing and CL Trials Release Build Number: 1.1.31.0
Release Date: 11th December 2024
New Features and Enhancements
Patient Record: A new down arrow between the surname and salutation that will let you overwrite the salutation with various options
... Release Notes - Enterprise |
||
| Enterprise Dispense Update ... Dispensing - Enterprise |
||
| Christmas Opening Hours 2024
As the festive season approaches we wanted to make sure you were fully informed of our support opening hours over the coming weeks.
... Select Category - Select Software Version |
||
| Understanding KPI Reports Clinic Analysis Report (Previously KPI Report)
Clinic Date – Date of clinic
Staff Mem... General - i-Clarity |
||
| If I personalise my i-Clarity colours and font size on one PC, will those settings carry across when I log on to another PC? Almost all of the personal display settings are saved specifically to just that PC, because that depending on monitor size, working distance, brightness levels and practice location it can affect how you want your i-clarity to display, for example you may want it opening up with a larger font one PC but not on another or you may want the colourisation different in a darker room. We have a enhancement pending that will allow you to copy personalisation settings from one PC to another.... General - Enterprise |
||
| Contact Lens Clinical Record - Enterprise The i-Clarity Clinical Records module consists of 4 record types: Pre-Screening, Clinical Record, CL Clinical Record and Non-Sight Test (Supplementary Exam).
Contact Lens Clinical Record
The Contact Lens Clinical Record form is intended to record the clinical notes of any exam related to a contact lens appointment.
There are several text fields throughout the form that can be completely blank so that you can free type whatever you want into it.
Alternatively, you can use pre-created templates that have appropriate questions and (optionally) 'tags' - defined by right and left chevrons like these: << >> - that allow you to select from predefined lists of answers.
... Clinical Records - Enterprise |
||
| Non-Sight Test Clinical Record - Enterprise The i-Clarity Clinical Records module consists of 4 record types: Pre-Screening, Clinical Record, CL Clinical Record and Non-Sight Test (Supplementary Exam).
Non-Sight Test
The Non-Sight Test form is intended to record the clinical notes of any exam that does not require a refraction For example, it can be used for Dry Eye Assessments, Red Eye Emergencies etc.
Note - The name of the Non-Sight Test form can be changed in Maintenance. In order to do this, go the Branch tab and then System Parameters. On the right hand side there is a box that says 'Other Exam Known as', where you can type in the name you would like for this form.
Non-Sight Test Form Features
To open the Non-Sight test form, click on the 'Exams' icon at the bottom of the patient screen.
... Clinical Records - Enterprise |
||
| Pre-Screening and Clinical Records - Enterprise The i-Clarity Clinical Records module consists of 4 record types: Pre-Screening, Clinical Records, CL Records and Non-Sight Test.
Note that patient information in the Clinical Records module is more sensitive than that stored in other parts of the system. It is strongly recommended that you use Maintenance > Users > Form Permissions to create a user group for registered staff. You can then assign your professional staff to that group and ensure that only they have access to the full clinical records forms (CL Clinical Records, Clinical Records and Non-Sight Test form).
Minus Cyl vs Plus Cyl
Throughout i-Clarity, the system defaults to either plus cyl or minus cyl according to the preference of the logged in user. This is set up in the User tab in Maintenance.
Pre-Screening
The Pre-Scr... Clinical Records - Enterprise |
||
| Advanced Appointment Booking Guide
Advanced Appointment Booking Guide... Appointment Diary - Enterprise |
||
| More On The i-Clarity Patient Record - Enterprise Due Date and Recall Communications
Located on the middle right of the Patient Record is a summary of the patient's last visits.
... Clinical Records - Enterprise |
||
| Due Date and Recall Communications - Enterprise Located on the middle right of the Patient Record is a summary of the patient's last visits.
... Main Form - Enterprise |
||
| Creating Sample Mailmerge Files - Enterprise When creating documents to be used within i-Clarity, you are able to use mailmerge fields to include patient specific data. To create these mailmerge links, you will need to create a Sample Merge File which Microsoft Word can use.
To create these files:
Whilst on a patient record (it does not matter which patient record), click on 'Extras' at the bottom right of the screen.
This will bring up the following menu. Click on 'Create Sample Merge Files'.
... Main Form - Enterprise |
||
| View Recently Accessed Patients If you want to find patients that have recently been searched for, click in the Patient Search box and click 'Recent Searches'.
... Select Category - Select Software Version |
||
| Creating A New Patient Record - Enterprise To create a new Patient Record click on the 'New PX' button next to the Patient Search bar at the bottom left of the screen.
... Main Form - Enterprise |
||
| Anonymise A Patient's Record - Enterprise We do not recommend this is done until the Patient Record has been transferred into the Archive branch.
In the patient's record that you want to anonymise, click 'Extras' and then 'Anonymise Patient'. This will remove all the data from the Patient Record that makes it identifiable.
... Main Form - Enterprise |
||
| Change Users - Enterprise To change users, click on the User Options button and then click 'Change The User'.
... Main Form - Enterprise |
||
| Update Products Button - Enterprise i-Clarity downloads a list of products when you log in.
If any amendments are made to the products in i-Clarity during the working day, you can either log out and back in to i-Clarity to update your product search list or you can click the Update Products button on the Main Patient Screen.
... Main Form - Enterprise |
||
| Refresh The Patients List - Enterprise When you first log in to i-Clarity, a list of the patient records stored within the system will be temporarily downloaded to your computer. This list remains on your computer whilst you are logged in to i-Clarity. This means that the Patient Search looks through the list on your computer rather than communicating with the server, speeding up the patient search.
Any new patient records that are added after you have logged in will not appear in the search list. In order to get these patients to appear on the search list, you can click the refresh button to redownload a new patient list.
Open the Patient Search and click 'Refresh Search Data' in the top left corner.
... Main Form - Enterprise |
||
| Why Is My Patient's Date of Birth Highlighted in Yellow? - Enterprise On the Patient Record, the patient's name will be highlighted yellow if the patient is aged under 16.
... Main Form - Enterprise |
||
| Why is The Patient's Name Highlighted in Red or Green? - Enterprise On the Patient Record, you may notice that the patient's name is sometimes highlighted.
The patient's name will be highlighted in red if they have an outstanding balance and owe the practice money that needs to be paid for through the Point of Sale module.
... Main Form - Enterprise |
||
| The Copy Patient Button - Enterprise This is a useful button when adding more than one family member to i-Clarity.
Click on 'Extras' and then 'Copy Patient' and i-Clarity will copy the surname, contact details and address of the active patient to a new patient record.
You can then enter the title, first name and DOB of the new patient, and amend any other details where necessary.
... Main Form - Enterprise |
||
| How to Change Your Password - Enterprise If you already know your password but would like to change it, load up i-Clarity and on the opening screen, click the ‘Change Password' button.
... Main Form - Enterprise |
||
| Quick Glance At The Daily Sales Summary - Enterprise It can be good to see how sales are going for the day so far. Located under the Dashboard drop-down is the Sales & Dispenses Summary.
... Main Form - Enterprise |
||
| Transfer a Patient Between Branches - Enterprise If you want to transfer the current patient to another branch, click on 'Extras' and then 'Transfer Patient'.
... Main Form - Enterprise |
||
| Logging in to i-Clarity - Enterprise To open i-Clarity, double-click on the i-Clarity Enterprise icon on your computer's Task Bar (if it has been pinned to Task Bar). If not, in your computer's Search Bar, type 'iClarity' and click on iClarity.
... Main Form - Enterprise |
||
| Scroll Through Patient Records - Enterprise On the Patient Record there are 4 arrow buttons which can help you navigate through your patient database.
... Main Form - Enterprise |
||
| The Family Filter Button - Enterprise The 'Family Filter' button in Enterprise is now called 'Family Search'. The 'Family Search' button will look for any other patients that have the same postcode and first line of address to the active patient and will then display those patient records in the Search box.
This is useful when booking appointments for more than one family member.
To use the 'Family Search' button, when you are on the Patient Record of the patient you want to view the family of, click in the Patient Search box, and click 'Family Search'.
... Main Form - Enterprise |
||
| How to Lock i-Clarity - Enterprise The ... Main Form - Enterprise |
||
| Adding a New Analysis Code - Enterprise Analysis codes are common headline information that you want to add to the front page of the patient's record. E.g. if a patient is on a direct debit, is diabetic or is part of a loyalty scheme.
You can also filter patients by analysis code in the Marketing module. By default, any code assigned to a patient will be displayed on the front page of their record.
... Main Form - Enterprise |
||
| Recording That a Patient has Stopped Wearing Contact Lenses - Enterprise If a patient has stopped wearing contact lenses, you may want to record this without removing their recall history.
You can do this by going to the patient's record and locating the tickbox labelled 'CLs Stopped on'.
... Main Form - Enterprise |
||
| The Move Family Button - Enterprise The 'Move Family' button allows you to change the address and phone number on all the patient records of a family, without having to re-enter the details multiple times.
Firstly, make one family member the active patient record.
Click in the Search Patient box and click Family Search. This will display all patients with same postcode and first line of address as the active patient.
Click the 3 button menu next to one of the patients displayed and then click 'Move Family Address'.... Main Form - Enterprise |
||
| Merge Duplicate Records - Enterprise The Merge button is used when you have duplicate patient records and would like to reduce this into one record.
Make one of your duplicate patient records the active patient.
Click 'Extras' and then 'Merge Patient'. (Depending on your Maintenance settings this may ask you for a password to continue).
This will open the 'Merge Patients' pop up.... Main Form - Enterprise |
||
| Deleting an Analysis Code - Enterprise Analysis codes are common headline information that you want to add to the front page of the patient's record. E.g. if a patient is on a direct debit, is diabetic or is part of a loyalty scheme.
You can also filter patients by analysis codes in the Marketing module. By default, any code assigned to a patient will be displayed on the Patient Record.
... Main Form - Enterprise |
||
| Amending an Analysis Code - Enterprise Analysis codes are common headline information that you want to add to the front page of a patient's record. E.g. if a patient is on a direct debit, is diabetic or is part of a loyalty scheme.
You can also filter patients by analysis codes in the Marketing module. By default, any code assigned to a patient will be displayed on the front page of their record.
... Main Form - Enterprise |
||
| Using Analysis Codes - Enterprise On the front of the Patient Record, there is a box which shows the analysis codes selected for this patient. Analysis codes are used as prompts to provide you with key information about the patient or marketing opportunities that patient may present.
These analysis codes are listed in the Marketing module and can be used for targeted marketing communicatons.
... Main Form - Enterprise |
||
| Viewing the Action List - Enterprise By default, the Action List shows Patient Actions that are due today or overdue and actions that are assigned to all users and the user logged in.
When an action becomes overdue, the date will become highlighted in red on the Patient Record.
... Main Form - Enterprise |
||
| View Actions To Do - Enterprise On the top right of the Main Patient Screen is the notification button.
... Main Form - Enterprise |
||
| View A Patient's Document History - Enterprise To view a patient's document history, on their Patient Record, click the Patient drop-down at the top left-hand side, got to History Menu and then Document History. This will display a grid of the documents that have been created from or stored against the Patient Record.
... Main Form - Enterprise |
||
| View A Patient's Appointment Schedule - Enterprise To view a patient's appointment schedule, go to the Patient drop-down, History Menu and click on Patient Visit History. Here you will see a list of appointments the patient attended, rescheduled, failed to attend or has booked.
This can be useful when you want to see which practitioners the patient has seen before or appointment types the patient had in the past.
... Main Form - Enterprise |
||
| View A Patient's Record History - Enterprise To view a patient's record history, click on the Patient drop-down on the top right-hand side, History Menu and click Patient Audit History.
The Patient History shows a grid of the changes that have been made to the patient record. The top line shows the information that was on the Patient Record before the last change was made. The line below shows the information on the Patient Record before the change was made and so on.
... Main Form - Enterprise |
||
| Patient Activity Notes - Enterprise To view the Patient Activity Notes, click on the Patient drop-down at the top left-hand side and click on Activities (Notes and Actions).
... Main Form - Enterprise |
||
| How To Stop Marketing Communications Being Sent To A Patient - Enterprise On the Patient Record is a tick box labelled 'Stop Marketing'. Ticking this box will stop the patient appearing in the Marketing module for all communication types except when the 'Search Patient Database' and 'Ignore Communication Preference' options are selected in Marketing.
... Main Form - Enterprise |
||
| Examples of Using The Patient Action Facility - Enterprise General Action
A Patient Action should be added in this way when you want a note to appear on the Action List for a particular day and the Patient Action can be completed by anyone. For example, 'Please call patient to see how they are getting on with their new contact lens prescription.
Enter the date you would like the action to be completed.
Enter the details of the action that needs to be completed.
Depending on the content and importance of the action, tick or untick the reminder box, e.g. if the patient phones before this date does the staff member talking to the patient need to know this information immediately. If yes then the reminder box should be ticked.
Click Add.
Personal Action
A Patient Action should be added in this way when you want a note to appear on your action list for the day.... Main Form - Enterprise |
||
| Deleting A Patient Record - Enterprise To delete a Patient Record, click 'Extras' and then 'Delete Patient'. This will delete the active Patient Record permanently, however it will only work if there has been absolutely no activity on that record other than creation.
... Main Form - Enterprise |
||
| View And Complete Patient Actions - Enterprise The bottom section of the Patient Activity page is called the Patient Actions. In this section, you can record items that need to be done in the future, e.g. 'Call patient to follow up on new contact lenses' or information about the patient that needs to be flagged when they next contact the practice.
To access actions assigned to all patients, click the Dashboard drop-down and then click on 'Actions & Tasks'. The number displayed on the drop-down shows how many outstanding actions there are.
... Main Form - Enterprise |
||
| Adding To A Patient's Spectacle History To add to a patient's Spectacle History, click the Patient drop-down, History Menu and then click 'Spectacle History'. This will allow you to add and subsequently view spectacle history that is not stored in the patient's i-Clarity record. For example, for a new patient you could enter the prescription of a focimetered pair of the patient's spectacles they have purchased elsewhere.
... Main Form - Enterprise |
||
| i-Clarity Enterprise Core Modules Guide i-Clarity Enterprise Core Modules Guide
... General - Enterprise |
 | |
| Searching For An Existing Patient Record - Enterprise To make an existing patient's record active, search for the record and select it from the search results list.
The Patient Search box is located in the bottom right of the main i-Clarity screen.
... Main Form - Enterprise |
||
| Backdating NHS Remittance Payments - Enterprise Below is the suggested method for how to reconcile backdated NHS payments.
Create a patient called NHS Payment.
... EGOS - Enterprise |
||
| How To Stop Recall Communications Being Sent To A Patient - Enterprise There are two ways to stop i-Clarity sending Recalls to patients.
Method 1
One way to stop i-Clarity from sending recalls to a patient is by ticking the 'Stop All Recalls' box on the patient's record.
... Main Form - Enterprise |
||
| Adding A Patient Action The 'Patient Activity' tab is split into two sections. The bottom section is used to record items that need to be done in the future, e.g. 'Call patient to follow up on new contact lenses' or information about the patient that needs to be flagged when they next contact the practice.
... Main Form - Enterprise |
||
| Front Page Features - Enterprise These are the main features of the front page:
Branch Name
The name of the branch you are logged in to will be displayed at the top left-hand side of the screen.
... Main Form - Enterprise |
||
| The Main Patient Screen - Enterprise When you first log in to i-Clarity, you will land on a blank screen displaying the practice logo. No patient details are displayed on this screen.
... Main Form - Enterprise |
||
| Your next i-Clarity Enterprise Update Enhancements
DD Module Enhancements
The layout of the direct debit module has been modified so that the set up and editing of mandates is now done on a pop-up form rather than within the main form. This change is to allow for increased validation of DD setups.
... Release Notes - Enterprise |
||
| Staff Rota - Enterprise The i-Clarity Staff Rota links to the Appointment Diary. Staff members who have a clinic added to the diary will automatically have an entry created in the Rota, unless it was done in advance of the clinic creations.
Preparing To Use The Staff Rota
Rota Display in Diary
Underneath the name of the user running clinic, is a space for a summary of the Staff Rota to be displayed.
... Staff Rota - Enterprise |
||
| Cashing Up - Enterprise The i-Clarity Cash Up module has been designed with flexibility in mind. Cashing up can be done at the end of the day or can be done on the following morning. Even though it is recommended that you cash up at the end of each day that the practice is open, the Cashing Up module will accommodate a day being missed.
When you open the Cash Up module, it will display the last cashing up that was completed. Not until you click 'Begin Cash Up' will you be able to enter the final takings and float for the day. However, at any point during the day you can add the following entries on the Cash Up module:
When you take money to and from your practice safe.
When you take money to the bank.
When you complete an NHS or other deferred payment reconciliation.
When you take money from the till to spend on petty cash items.
It is recommended that you enter the above banking entries when they happen during the day to avoid items bein... General - Enterprise |
||
| Understanding Deferred Payments in i-Clarity Understanding Deferred Payments in i-Clarity
... General - Enterprise |
||
| Adding a Prescription with Core Modules Adding a Prescription with Core Modules
... Clinical Records - Enterprise |
||
| Patient Communications Set Up - Enterprise Patient Communication
Before starting this communication section, we recommend that you:
Decide on all your Recall Schemes. This is the expiry date of the patient's prescription and when the patient is due for another appointment.
Decide how many stages each of these Recall Schemes will have. Stages manage the time intervals of the patient's reminders.
Decide the order for your preferred communication types. Communications allow you to individualise your reminders to different groups of patients and allows you to assign alternative modes of communication if your preferred communication is not viable.
You should also have any Word documents for letters saved and ready. Your recall letters should be saved in the appropriate folder ready to be attached in Maintenance.
You can find the folder location by going to Maintenance, Branch & System and then B... Recalls and Marketing - Enterprise |
||
| Adding Sundry Products to i-Clarity Enterprise 1) Open the system Maintenance (click on the modules menu icon) ... Maintenance - Enterprise |
||
| Creating A Stock Adjustment For A Solution Or Accessory - Enterprise This process is used to record stock movements for solutions or accessories, e.g. a delivery from a supplier.
Navigate to the Stock Module by clicking on the Back Office & System Modules button and the clicking on Stock.
... Stock - Enterprise |
||
| Creating A Stock Adjustment For A Frame Already On The System - Enterprise This process is used to record stock movements for a frame that is already on the system.
Navigate to the Stock Module by clicking on the Back Office & System Modules button and the clicking on Stock.
... Stock - Enterprise |
||
| Adding A New Frame Model To The Stock System - Enterprise This process is to add a new frame model to the system.
Navigate to the Stock Module by clicking on the Back Office & System Modules button and the clicking on Stock.
... Stock - Enterprise |
||
| Creating A Stock Transfer - Enterprise Stock transfers are used to create stock adjustments for multiple products in one go. Either because they are being sent back to the supplier or because they are being sent to another branch.
(To record stock movements into the practice for more than one product at a time, the purchase order system should be used. See our other articles and training videos on this subject.)
The Stock module is accessed by clicking on the Back Office and System Modules drop-down and then clicking on Stock.
... Stock - Enterprise |
||
| Modifying A Stock Transfer - Enterprise Stock transfers are used to create stock adjustments for multiple products in one go. Either because they are being sent back to the supplier or because they are being sent to another branch.
(To record stock movements into the practice for more than one product at a time, the purchase order system should be used. See our other articles and training videos on this subject).
The Stock module can be accessed by click the Back Office and System Modules drop-down and clicking Stock.
... Stock - Enterprise |
||
| Receiving A Stock Transfer - Enterprise Stock transfers are used to create stock adjustments for multiple products in one go. Either because they are being sent back to the supplier or because they are being sent to another branch.
To record stock movements into the practice for more than one product at a time, the purchase order system should be used. See our other articles and videos on this subject.
The Stock Module is accessed by clicking on the Back Office and System Modules drop-down and then clicking 'Stock'.
... Stock - Enterprise |
||
| Creating Staff Types - Enterprise Staff Types are used to allocate appointments to Staff Groups. When you add a User, you allocate them to a Staff Group from this list that you are creating now. They will then be bookable for the appointments in that group. (The appointments are added in 'Appointment Types' in Maintenance). For example, Contact Lens Opticians will be assigned Contact Lens Aftercare appointments and Contact Lens Trial appointments but not Eye Exam appointments.
Navigate to the Maintenance module by clicking on the Back Office and System Modules drop-down and then clicking on 'Maintenance'. Then click 'Users' and then 'Staff Type'.
This will load the following screen.
... Maintenance - Enterprise |
||
| Add A New User - Enterprise Please note: We recommend that you complete the 'Staff Type' and 'Form Permissions' sections of Maintenance before completing the Users Tab. If you have not already done so, please go back to the 'Creating Staff Types' and 'Creating or Editing Form Permissions' articles.
Navigate to Maintenance by clicking on the Back Office and System Modules drop-down and selecting 'Maintenance'.
... Maintenance - Enterprise |
||
| Understanding Purchase Order References - Enterprise All Purchase Orders are identified by a unique Purchase Order Number which has the following format:
BBB/TXXX
BBB is the Branch Code, T is the Type and XXX is a sequential number.
The Types are as follows:
S - Spectacle, i.e. glazing orders.
L - Lenses ordered separately from the glazing order, e.g. Uncuts or Remote Edged.
F - Frame ordered for a glazing order but from a separate supplier to the workshop.
ST - Stock, i.e. products NOT ordered for a specific patient.
C - Contact Lenses.
So a typical Purchase Order Reference might look like these -
... Stock - Enterprise |
||
| Creating Purchase Orders Through The Dispense Module - Enterprise i-Clarity Purchase Order Processing consists of 5 stages:
Creating an initial Purchase Order.
Sending it to the supplier.
Recording the goods and services that have been received.
Reconciling the goods received with the supplier invoice.
Exporting the confirmed invoice to an accounts package, e.g. Xero, for analysis and payment.
Purchase Orders are created in 5 different ways:
When you create a spectacle order by confirming a dispense.
When you create an order from the CL Management form.
From the Stock Form - e.g. for frame stock.
From the Stock Form - automated 'Impress' ordering.
From the Stock Form - using automated reorder quantities.
This article looks at method 1, creating a Purchase Order through the Dispensing module by confirming a dispense.
Creating A Spectacle Order... Stock - Enterprise |
||
| Locking And Unlocking Clinic Times - Enterprise You can now lock and unlock clinic times within the diary. This is a separate feature to reserving appointments.
Locking an appointment is designed to make it difficult to book an appointment in to that slot, with only the user who has locked it/ the user whose clinic it is/ a super user able to unlock it. In this respect a locked appointment is for blocking out time in the clinic that isn’t intended to be booked into, this could be for training, a visit from a rep, or lunch.
Locking An Appointment
To lock an appointment, right click the appointment and select 'Lock Slot & Make Unbookable'.
... Appointment Diary - Enterprise |
||
| Defaulting Lunches As Locked/Unlocked - Enterprise By default, lunches are marked as locked. However, should you wish this to be just a 'Reserved' appointment, you can do so through the Users tab in Maintenance.
Click the 'Edit' button next to the user you wish to change their lunch set up.
... Appointment Diary - Enterprise |
||
| Deleting A Clinical Record To delete a clinical record, navigate to Maintenance > Misc > Delete Clinical Record.
... Clinical Records - i-Clarity |
||
| Custom Appointment Durations - Enterprise You may have a user who needs a different amount of time to carry out an appointment to the one that the appointment is set to. E.g. you may set an eye exam to be 30 minutes, but your pre-reg optometrist may need 45 minutes. In order that the correct amount of time is blocked out for the pre-reg, without users having to manually alter appointment times, you can create custom appointment lengths.
Click the Back Office & System Modules drop-down and then click on 'Maintenance' to navigate to the Maintenance module.
... Maintenance - Enterprise |
||
| Choose KPI Recipients - Enterprise If you would like KPIs to be sent to Users, you can do this in Maintenance.
Click the Back Office & System Modules drop-down and then click on 'Maintenance' to navigate to the Maintenance module.
... Maintenance - Enterprise |
||
| Find The Location of Recall or Adhoc Docs Folders - Enterprise You can find the folder location in Maintenance.
Click the Back Office & System Modules drop-down and then click on 'Maintenance' to navigate to the Maintenance module.
... Maintenance - Enterprise |
||
| Cancellation Reasons - Enterprise This is where you can populate reasons a patient record may be cancelled. A cancelled patient's record will not allow any appointments to be booked, no transactions to got through and no communications to be sent.
Click the Back Office & System Modules drop-down and then click on 'Maintenance' to navigate to the Maintenance module.
... Maintenance - Enterprise |
||
| Refresh Interval For Individual Clinic Window - Enterprise In the the Diary, you can open the day's clinic in a separate window so that it is available to look at without going in and out of the appointment's module. It is particularly useful for the clinician. You can set how often this window refreshes with up-to-date information in Maintenance.
In Maintenance, click 'Branch & System' and then 'Branch Full Config'.
On the top right-hand side is the following setting.
... Appointment Diary - Enterprise |
||
| Change Patient Notes Display Period - Enterprise i-Clarity creates a number of system notes in Patient Activity for when appointments are booked, changes are made to the Patient Record, communications are sent etc. You can choose how long these notes stay in the system for, in order to keep the Patient Activity page tidy.
Go to Maintenance, Branch & System and then click on 'System Parameters'.
On the top right-hand side, under 'Editing and Warnings' is the following setting.
... Maintenance - Enterprise |
||
| Create Custom Patient Folders - Enterprise You can add or scan documents to patient records such as Hospital Letters, Fields Results, Previous Records etc. You can separate the documents out into different folders to make it easier to find what you are looking for when you retrieve them. If you wish to add any extra patient folders, such as PEARS/MECS Paperwork, you can do so in Maintenance.
Go to Maintenance, Patient Communications and then 'Patient Folders'.
In the 'Add Patient Folder' section at the bottom of the screen, type in the name of the Patient Folder you would like to add. You can choose the order that the folders appear in the list by putting the number in the box. This will order the folders so that the most popular ones are at the top. (The lower the number, the higher up the list the folder will appear). Otherwise, they will be displayed in alphabetical order.
Then click '+'.
... Maintenance - Enterprise |
||
| Enable Password Protection Throughout i-Clarity - Enterprise i-Clarity allows you to password protect individual areas and functions of the system.
Go to Maintenance, Branch & System and then click 'Password Protection'. This form allows you to add the requirement to enter your password when accessing certain areas of the system. This is done per computer because you may want to have an increased level of module password protection on front of house computers where staff move between computers, compared to a consulting room where there is little or no change of computer user.
Each column, when ticked, requires a password to open the corresponding module in i-Clarity. We recommend, as a minimum, the financial modules of the system have password protection active.
... Maintenance - Enterprise |
||
| Set SMS From Name - Enterprise To set up SMS from name, go to Maintenance, Branch & System and click on 'Branch Full Config'.
On the left-hand size, there is an 'SMS From' box. Type in the name you would like to appear as the sender on your SMS messages.
... Maintenance - Enterprise |
||
| Create Email Footer - Enterprise You can add an email footer for each branch, that will be added to the bottom of all emails sent through i-Clarity. To do this, go to Maintenance, Branch & System and click 'Branch Full Config'.
Double click on the text box. This will open a new window.... Maintenance - Enterprise |
||
| Send Long SMS Without Prompting - Enterprise There is a character limit of 160 per SMS message. If you go over this character count, there will be additional charges.
In Maintenance, Branch & System and then 'System Parameters', there is a 'Send Long SMS Without Prompting' checkbox.
If this checkbox is NOT checked, when sending mass communications such as recall or marketing, the communications will fail to send if the SMS messages are over 160 characters.
If the box IS checked, then the communications will send, even if the character limit has been exceeded, but you will be charged for additional messages.
... Maintenance - Enterprise |
||
| Adding Appointment Types - Enterprise To add an Appointment Type, got to Maintenance, Appointment and then 'Appointment Types'.
Use the top half of the screen to add the new Appointment Type.
... Maintenance - Enterprise |
||
| Manage And Assign Practice Resources - Enterprise If you have resources in your practice that are limited, you can add them to i-Clarity so that they can be assigned to an appointment. The colour of the appointment will change to reflect that the resource will be in use, so that others are aware not to book another appointment at the same time with the same resource. Examples could be if you only have one coloured overlay set or one disabled parking space.
Go to Maintenance, Appointment and then click 'Appointment Resources' to load the Appointment Resources form as shown below.
... Maintenance - Enterprise |
||
| Adding Patient Sources - Enterprise This is where you can add options of how your patients may have heard of you and add it to their record. This list is also used in the attendance reason drop-down list when you are booking appointments. This is useful for recording how successful marketing campaigns are or how many patients have been recommended to your practice using the Reports in i-Clarity.
Go to Maintenance, Patient Information and then click 'Patient Source' to load the Patient Source form shown below.
... Maintenance - Enterprise |
||
| Adding Corporate Company Details - Enterprise When someone else is paying for services or products on behalf of the patient, the balance is cleared off the patient's record as they do not owe any money. The balance to be paid goes into the Deferred Payments module, so that you can track what is owed.
Payments due for GOS forms on the NHS are already set up to go to Deferred Payments, but you may have other third party payers such as Eden Red or a local company that uses your services for their employees.
You can add the details of any corporate clients that you use for their eye care and third party national corporate schemes. This can then be added to a patient's record and when a corporate fee goes through the till, the fee will go into the correct corporate file in Deferred Payments. You can also use a Corporate to automatically pay a product off into the correct Deferred Payment folder, e.g. you can have an Eden Red eye exam fee and when this is selected it will not go through to the Till page, it will autom... Maintenance - Enterprise |
||
| Setting Up Occupations - Enterprise You can create a list of occupations to record in a patient's record. There will be a list of common occupations already in i-Clarity, but you can add more by going to Maintenance, Patient Information and then 'Occupations'. This will load the Occupations form shown below.
... Maintenance - Enterprise |
Page 1 of 1