
Knowledge Base
Your search for returned 32 results across 4 page(s). Search Category: Technical Tips. Software Version: All Versions.
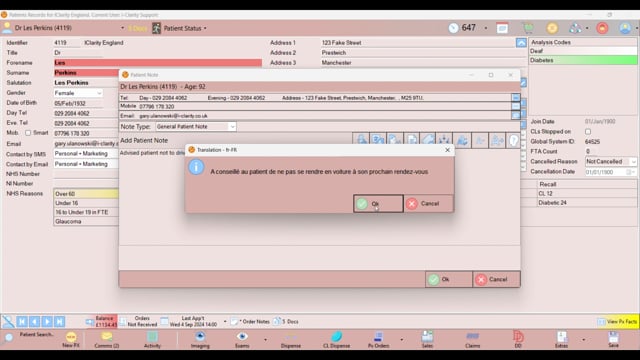
| Enterprise Tips: Voice to Text & Translation VIDEO: Enterprise Tips: Voice to Text & Translation
i-Clarity features the ability to use voice to text in any smart text box.
Smart text box can be identified by the icons at the top of the text box that allow additional features. One of these features is Voice to text.
Simply click the microphone icon and then begin speaking.
Once you have begun speaking your computers microphone detects what your saying and once you stop speaking it’ll be translated to text in the text box.
This a handy way of entering notes that are more conversational or d... Technical Tips - Enterprise |
 | |
| Enterprise Tips: Templates in Text Boxes VIDEO: Enterprise Tips: Templates in Text Boxes
You can now populate any smart text box with a either a personal or generic template.
Smart text boxes can be identified by the buttons at the top of the box which allow for additional features.
To enter a template click the document with an arrow icon. This loads your templates list.
Select whether you wish to view “my templates” or “generic”
The choose your template of choice.
You can then choose whether you wish to overwrite the text that is currently in the box or by unselecting ... Technical Tips - Enterprise |
 | |
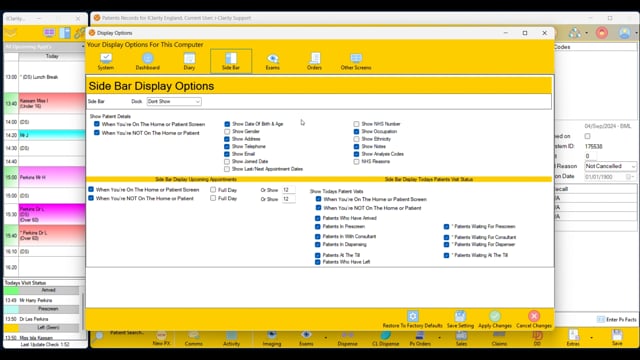
| Enterprise Tips: Sidebar VIDEO: Enterprise Tips: Sidebar
i-Clarity has a sidebar that can sit alongside your patient records and be tailored to display information that best suits the users needs.
To show this side bar click “user options” then “show side bar”
We can select whether we want the side bar to be on the left or the right with the docking button, this switches the side bar from one side to the other. Or should you want it somewhere else, you can unlink from the side of your i-clarity to move it somewhere else, for example on another screen.
This side bar can sit alongside your i-clarity and h... Technical Tips - Enterprise |
 | |
| Enterprise Tips: Sorting Deferred Payments by First Name VIDEO: Enterprise Tips: Sorting Deferred Payments by First Name
You can sort your deferred payments by first name to match the remittance spreadsheet received by PCSE.
First set your date ranges so they match that of the ranges in the spreadsheet. This will mean that the selection when sorting should very closely resemble the spreadsheet.
Now click the first name heading within the deferred payments table.
Your deferred payments are now sorted by first name and should be easier to reconcile your remittance that can also be alphabetised by first name with... Technical Tips - Enterprise |
 | |
| Enterprise Tips: Profile Pictures & Patient Portraits VIDEO: Enterprise Tips: Profile Pictures & Patient Portraits
Within i-clarity you can upload pictures from your PC to act as your profile picture or if you take images of your patients you can have them as patient portraits.
To upload a profile picture
Click user options
Change your profile
Enter your password
Press select
Now find your picture in your windows explorer and press open
This is now set as your profile picture and will be displayed in the top right hand corner whilst logged into i-clarity.
A profi... Technical Tips - Enterprise |
 | |
| Enterprise Tips: Right Click for Data Entry VIDEO: Enterprise Tips: Right Click for Data Entry
While all prescription and measurements boxes can be entered via the keyboard you can also enter measurements by right clicking on the box and selecting from the option available.
All boxes have the relevant measurements available on right click, for example prescription boxes all have the relevant data formatted correctly. As do the measurements in dispense.
One particularly useful place is the “order options” which gives measurements in their correct format when right clicking.
Meaning lenses that need ... Technical Tips - Enterprise |
 | |
| Enterprise Tips: Predictive Statements VIDEO: Enterprise Tips: Predictive Statements
Predictive statements allow you to create tailored databases within each smart text box in i-clarity.
Smart text boxes can be identified by the buttons at the top of the box which allow for additional features.
One of the primary features of any smart text is predictive statements. These are statements that will load at the bottom of the box to be selected when typing.
These predictive statements are tailored to the user in the box you are leaving them, meaning that users can have their own individual custom statements and tha... Technical Tips - Enterprise |
 | |
| Enterprise Tips: Close and Go Buttons VIDEO: Enterprise Tips: Close and Go Buttons
Close and go button are found throughout i-clarity offering a seamless way of transitioning from one module to another without the need to manually find it yourself.
Meaning you can build in your own workflows when acting on specific tasks that require multiple modules.
In any module within a patients record you will be afforded the ability to either Close the module with the Close button, this closes the screen and takes you back to the patient record.
The Go button however offers you the ability to move to another part of the ... Technical Tips - Enterprise |
 | |
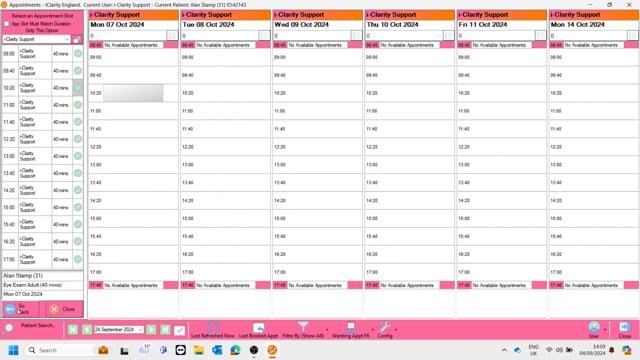
| Enterprise Tips: Appointment Search VIDEO: Enterprise Tips: Appointment Search
Along with the drag and drop feature of booking an appointment you also have the ability to do an appointment search. This appointment search feature filters the diary and makes finding an appointment for the patient quicker.
First, search for the patients name in the diary search. Now right click their name and select “appointment search”.
This adds an extra column to the left hand side of the diary. From here you can filter the appointments presented to an individual optom if the patients requests to see an particular member o... Technical Tips - Enterprise |
 | |
| Enterprise Tips: Adding Stock and Frames in Dispense VIDEO: Enterprise Tips: Adding Stock and Frames in Dispense
From the dispensing module you can adjust stock and enter new frames.
While in dispense when selecting the frame you are told whether it is in stock or not. If not,
Find the frame, in choose frame,
Select the frame and then you have the button add to stock, and you can choose the quantity you wish to add.
Great for instances you are about to dispense a frame but are told it isn’t in stock but you know you have it.
Or it can be used as a means to negate having to adjust the stoc... Technical Tips - Enterprise |
 |